| My First Shaker Card! |
Saturday, February 4, 2017
Shaker Gift Card
Wednesday, February 1, 2017
Hand Made Journals
Saturday, January 28, 2017
Family Recipes and Kitchen Memories
| Family Cookbook in the making
I've been wanting to create a family cookbook for years. I started typing it in 2011 and just finished it in time to give it as a gift this Christmas!!! When I first came up with this idea - many years ago - I had sent emails to family members asking for recipes but only Dana wanted to participate. Between the two of us we compiled recipes that we remembered our parents and other family members making, along with memories relating to holiday meals and cooking in general.
When the idea was hatched we thought about how to actually put it together and we thought maybe a three-ring binder would work because we could find them at any store and we'd be able to add recipes in the future. Between then and the time it was finished, Dana had purchased a brand new, unopened binding machine, along with all the binding combs we could ever use, for about $20 at a teacher supply store sale.
I knew I wanted a retro, 50's feel to the cookbook, so I used red gingham paper from Hobby Lobby for the front and back cover. I used white cardstock for the section dividers and the title on the front. I didn't have a font that I liked on my computer so I searched the internet for a suitable font.
I'd never downloaded a font before so I didn't know how hard it would be. Turns out - it was super simple! I used the Remachine Script font from DaFont.com. It was free for personal use. The download instructions on DaFont was very easy to follow. Now that font is installed on my computer and can be used for anything. I used that font for the cover page and all divider pages.
I typed all of the recipes in Microsoft Word. Once I had them all typed in, I added a Table of Contents. Once that was done, I could add recipes or move them around and re-build the table of contents. It was super convenient.
Using the binder is pretty simple. To punch holes in the sheets you just center the sheets to be perforated, set the paper stop, and pull down on the handle.
I made the cookbooks 8.5" by 5.5" (half a letter size sheet of paper). The covers are a bit larger. I used black cardstock to make the covers a bit sturdier. I used glue sticks to adhere the red gingham paper to the cardstock, then I laminated all the covers.
Since the covers are a bit larger than the paper, I had to reset the paper stop on the binder to punch the holes in the center of each cover. Then I trimmed the binding combs to match the number of holes in my books and bound them.
|
Friday, January 13, 2017
Hand Made Bath Tea
One of the home made Christmas presents I made this year was a "bath tea". The teas can be made of various things, including milk. The idea is to suspend the tea bag from the faucet while filling the tub, and/or drop one or more tea bags into the tub as it is filling. My tea is made from botanicals, herbs, and essential oils. I used dried calendula flowers and lavender buds (purchased from the health food store), dried rose petals, mint and clover blossoms harvested from my yard, and lavender essential oil. I mixed up the ingredients, sprinkled on the essential oil and stored it in a jar for about a month to let the fragrance soak into all the plant products.
I had purchased the DIY tea bags at the health food store. I bought them to make home made tea from my mint and clover blossoms. Quite a few come in the package. The tea bags come joined together, but perforated for easy separation. One side is open for filling. They come with a little "tag" and string just like a regular tea bag.
Each tea bag is a regular size tea bag. The larger "family size" tea bags definitely would have been better for this purpose. But it's what I had on hand...
So I stuffed each bag with as much tea as I could get in it. I then heat sealed the open end. I keep a cheap, 1 inch hair straightener in the kitchen for sealing mylar bags and other items. After using these tea bags, I can see that I could have made my own using interfacing and stitch witchery to seal the edges, at a MUCH cheaper cost. That way I could have made the bags an size I wished.
I don't know how they worked out because I haven't received any feedback from the recipients. These little tea bags would also be great to put in a drawer as a sachet.
Sunday, January 12, 2014
Modern Gray and Yellow Table Runner
Saturday, December 24, 2011
Friday, December 23, 2011
The Stockings Were Hung . . .
Wednesday, December 21, 2011
Homemade Christmas, the Mud Room and Food Storage
{2011 Cabinet}
In the new cabinet, Marc built the shelves a little closer together so I can get more smaller items stored. The very top shelf is lower on the front and higher in the back and has a lip on the front, so that I can put cans on it and they will roll forward. I have 4 cases of canned goods on this shelf already and there's room for more. I have rice, oats, beans, and more stored in this cabinet. I organized everything and took an inventory of what I had in there. I was surprised to see just how much I had stored, but there's still room for more. I've been shopping sales and stockpiling sale items and it adds up pretty quickly. After Christmas I'll do a post about home food storage or "stockpiling".
Tuesday, December 20, 2011
Another Quilt As You Go Table Runner
I'm officially in love with making Quilt As You Go table runners. They are SO fast and easy. I bought a Charm Pack from Nancy's Notions sometime this year when it was on clearance, for like $2.50. It's by Deb Strain for Moda, but that's all I can remember. Anyway, the colors and designs are so modern. I originally thought I would use this to make a patchwork dress/jumper for Journey for Christmas, but after tearing up the attic looking for that pattern (I'd saved it from a Woman's Day magazine from the early 80's), I abandoned that idea. Maybe next year for that project.
Monday, December 19, 2011
Naughty or Nice
This fabric at first glance doesn't look "Christmasy" at all. But if you look close there's a stocking, present, snowflakes, etc.
Tuesday, December 13, 2011
Fun With Fleece
Since there are only twelve days till Christmas I thought I would title this post "The Twelve Days of Christmas" and do a post every day until Christmas, but then I realized that was too much pressure . . .
I decided to make a hat and scarf for my granddaughter Rylan who lives in a colder climate for Christmas. She plays in the snow and needs to stay warm. She won't wear clothes that Grandma makes, but I figured I might be safe with a hat and scarf.
I first used a pattern for a hat which turned out terrible! It wasn't lined so it wouldn't be very warm, and the brim/band was floppy. It called for lapped seams, which made it look way too home made. I then tried serging, which worked better. But the band was just too limp, even thought I tried doubling the band by using a lining. Trash that one.
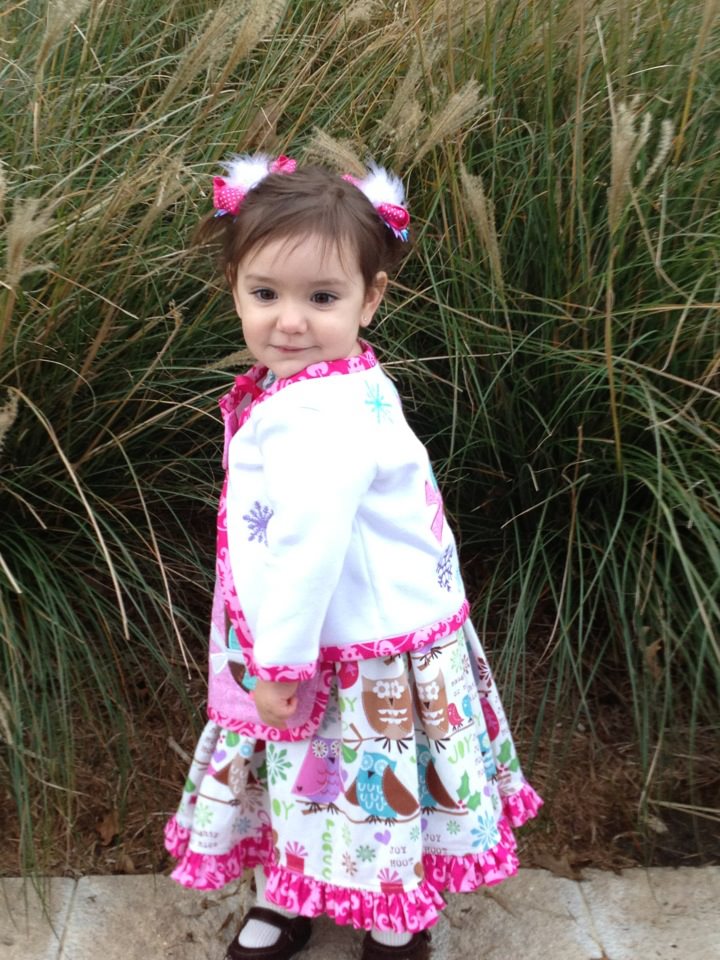
The booklet said to cut a scarf 9" wide. Again I used two fabrics, white for the outer fabric and pink with dots for the lining. I cut the scarf the width of the fabric. First I embroidered a winter owl motif on one end and two snowflakes on the other of the white fabric. I then cut off some of the excess fabric on the selvedge ends and made that into fringe, then top stitched the whole thing.
Both projects were fun and easy!
Wednesday, January 27, 2010
Tea Towels - Make your Own!
Here’s a quick and easy project you can make for yourself or to give as a gift. Following are the instructions for the two different types that I’ve made.
Method 1 - Using purchased terry towels
I purchased plain white waffle-weave cloth towels in the kitchen department of the local “big box” store. They came in a pack of three for less than $6. Prewash and dry the towels and press. Do the same for the fabric unless you buy quilting cotton, in which case it’s already preshrunk.
Using the width of the purchased towel as a guide, cut a band of fabric the width of the towel plus 1” (the seam allowances will be ½”). Make the band as long or as short as you want, this is just the decorative band which will be at the bottom of your finished towel. This is where you can use scraps left over from other projects. In this case I used a band about 5” long so that I ended up with a 4” strip at the bottom of the towel.
Cut off the hem from the bottom only of the purchased towel.
With the right side of the band to the wrong side of the towel, and raw edges even, stitch or serge using ½” seam allowance.
Press, folding band to the right side of the towel. Then press under your seam allowances on all raw edges of the band – 1/2” on each side of the band and ½” at the top of the band. Press well.
If you want to add any embellishment, such as ric-rac, this is the time to do it. I inserted jumbo ric-rac just under the band so the top of the ric-rac shows after it’s all assembled. You could also add piping or a coordinating strip of fabric. If you’re using any embellishment, stitch it in place before proceeding to stitch the sides. You can also add a decorative stitch here. I used the featherstitch.
Then stitch along each edge of the band using a regular straight stitch to secure the edges of the band to the towel. That’s it!
Finished Towels, to be given as Christmas Gifts!
Method 2 - Creating your towel from fabric
This method is a little more work. You’ll need a fabric that’s 100% cotton for absorbency. I used an interesting heavy fabric that I found at the quilt store for the “towel” part and a pretty green and red paisley for the decorative band.
Decide what size you want to make your towel. The best way to do that is look at some towels you already have and measure them. I wanted mine about 18 x 28 inches, finished size. Be sure to add ½ inch seam allowances to all edges before cutting.
So, I cut the "towel" fabric 19” wide by 25” long and the decorative band fabric 19” wide by 9” long.
With right sides together, having raw edges even, stitch or serge the decorative band to the towel.
Press, pressing seam toward band.
If you have a serger, serge all edges then turn under ½” and press.
Fold the decorative band wrong sides together so that the pressed edge meets the seam on the back of the towel. Press well then “stitch in the ditch” on the right side, catching the pressed edge of the band on the back of the towel.
Finished Towels!