Wednesday, October 29, 2014

Outdoor Canning

 
We set up an outdoor canning area in order to keep the kitchen clean and cool.  I didn't relish the idea of lugging in produce across the new wood floor, cutting, slicing, dicing, washing, then blanching, draining, chilling, etc... and having that mess in the kitchen.  And since I'm pretty messy while cooking, a lot of it would have ended up on the floor.


Now, this outdoor "kitchen" is nothing more than a tent with a couple of folding tables, a gas grill with side burner, a fire pit and a couple of folding chairs.  Nothing fancy by any means.  But having it set up outside, I can run the hose and wash produce and dump the water in the grass and it flows right down into the garden, and I don't have to think about all that water going into the septic tank.   
 
I can peel and just fling the discards right into the pig bucket or on the grass.
 
The burner on the gas grill works well for heating water for blanching or even canning.  I canned carrots in the pressure canner on the burner.  To can the carrots, I used the so-called "cold pack" method.  The hardest part about the whole process is the peeling - it took what seemed like hours. 

I had some old seed I was trying to use up and figured it wouldn't germinate well so I seeded quite heavily.  I never did get around to thinning them out and before I knew it I had a million medium sized carrots.  Obviously, peeling lots of small carrots takes longer than peeling one large one.... Lesson learned here. I did manage to can up 32 pints of carrots, and froze quite a lot, not to mention ate a lot of them fresh.  Frankly I don't want to see another fresh carrot for a while....
 
Anyway, I cut the carrots into the size pieces I wanted and filled the clean jars.  Meanwhile, I brought a pot of water to boil on the grill burner.  I dropped my canning jar lids in that water to heat them.  When the water came to a boil, I moved the pot over to my work station.  I used the hot water to ladle over  the carrots in the jars, filling to within 1" of the top.  Then placed a jar lid and ring and placed each jar in the canner.  After filling all the jars with the boiling water, I added 3 quarts of the water to the canner and set the canner on the burner to heat up. 
 
 
To save on propane, Marc set up a makeshift fire pit.  He found broken chimney blocks from a chimney that had been removed from the house years ago and used them to fashion a spot for me to place a big pot or canner.  Wood is free and propane definitely is not.  In the pic above I'm blanching corn on the cob.  I blanched enough corn for 28 dinners, then more squash and zucchini, and finally about 5+ pounds of green beans, all for freezing, in one session.  I can't imagine the mess all of that would have made in the kitchen.
 
I keep a bottle of dishwashing liquid by the hose and when I'm done I wash everything and store all my supplies in a commercial food grade "lug" - ready for the next canning session.

Monday, July 14, 2014

Zucchini... out the Wazoo


I've often heard that you can't kill squash and zucchini and that you're inundated with them when you grown them.  I've never had the best of luck with them in the past.  The only reason we have so many fruits is that we have a lot of  plants. 
 
Stink bugs seem to be everywhere here and they love to eat everything, especially squash.  Plus it seems like several fruits on each plant mold.  So if we only had a few plants we wouldn't have much squash or zucchini to eat I'm sure.  I think we have about 20 plants producing right now and more coming up. And butternut squash are about 7 inches long.  Fingers crossed that nothing eats them!
 
Every couple of days I am blanching and freezing them.  In the pic above I have 9+ pounds bagged up ready for the freezer.  We're eating it fresh just about every day too.  We may get tired of it soon, but in the winter we will be happy to have lots of it in the freezer.
 
I made fried zucchini the other night and they turned out good, even though I forgot to add salt.  I made them by dredging the slices first in seasoned flour, then dipping them in beaten egg, then a final coating in panko crumbs.  My thermometer broke so I had to wing it on the temp.  As you can see they are a wee bit darker than I would prefer.  I made home made sour cream ranch to dip them in.  Yummy.
 
I am weighing or talllying up everything that we put up this year.  I've tried in the past and petered out but I am determined to get a grand total on everything that we put up this year.  Stay tuned for more exciting posts on vegetables . . .


Wednesday, July 2, 2014

Blueberry Pancakes

 
The couple from whom we bought the farm had planted some blueberry bushes but apparently didn't water them well, so about half or more of them died off over the course of the summer and through the winter.  A few survived and having fresh blueberries is quite a treat.  They are so much easier to care for than strawberries and easier to pick than the black raspberries.  So we'd like to plant more in the future.  The plants we have are very small so this may be the first year they've borne fruit.
 
I go out and pick the black raspberries and blueberries every couple of days.  I get just enough blueberries to use in muffins or pancakes or to eat over ice cream, but not enough to freeze.

 
My way of making blueberry pancakes is to simply make the usual recipe from the red & white checked cookbook, pour the batter on the griddle and sprinkle on a few blueberries before flipping the pancake. 

 
The stove we bought for this house has a large burner in the center, which is perfect for a griddle. 
 
The blueberries are sweet and make delicious pancakes. 

Tuesday, June 17, 2014

Totes Ma Goats

New Kids on the Block er... Rock
I've wanted goats for as long as I can remember.  I've never actually had any so it has been a learning curve.  I wanted a doe (female) for milk and two males to train to pull a cart (more about this strange obsession below).  Dana and Mike gave me the little doeling for a birthday present!  She got some from the same place on the same day - we had like six goats on the backseat on the way home.

I got the two little boys so I would have matching working goats.  Well, one of the little boys was never quite "right" and he died.  It was pitiful knowing there was nothing I could do for him.  Just about the time I was going to put him down, he died.

I got them on March 20th.  They were born around a week before that.  So as of this writing they are still on the bottle... twice a day.  We are working to wean them off the bottle.  While Dana and Mike had milk cows producing it wasn't a problem, but they had to dry up the cows and that left me in the lurch.  I bought four gallons of goat milk from the same lady I got the goats from and decided it was time to wean them.  Because they're bottle fed, they treat me and Marc like their parents.  If anything startles them they run straight for us for protection.  It's completely adorable.

They wear collars with little bells and when they're out "playing" they prance and jump and the bell jingles.

In this pic of Snowflake below, you can see where she was "disbudded" - a nice word for having her horns seared to the point they won't grow.  I had the breeder take care of this unpleasant matter before getting any of them.  I certainly didn't want a horned goat and yet I knew I could never dehorn one.  As of today, the horn area is completely healed and the hair has grown over so you wouldn't know it was ever there.

Snowflake
I am not good at coming up with names.  Rylan named Snowflake.  The jury's still out on the boy, whom I call Boy.  I am leaning towards Casper the Friendly Goat. 

They have really grown. The pic below is Boy, quite soon after I got him.  He's just chillaxin.

 
And here he is trying to get in Marc's lap in that same chair.  He's just a BIT bigger now as you can see. He will get quite large - as tall as my waist. He'll be strong enough to pull a cart with a heavy load in it.
 
He kept leaning against Marc - it was so cute.   He definitely has a sweet personality. He has been "wethered" (neutered) so he is going to stay mild mannered.
 
Back to the goat cart obsession.  I remember my Dad had a do-it-yourself book called Children's Play Structures or some such.  He once set out to make a playhouse/fort, but it never got off the ground so to speak.  Anyway, in this book there were plans to make a Goat Cart and it showed a goat pulling kids (human ones) in a cart.  I was fascinated and still am.  I have visions of Boy pulling my grandkids in a cart in a parade.  He is becoming leash trained, so we're on the way. 

Sunday, June 15, 2014

No Thank You


If you have gleaned anything at all about me reading my blog... take away this - I hate above all else, bugs of all kinds.  I even detest butterflies, except from a distance. 
 
One morning I saw this... thing... on the back screen door and got the best pic I could without actually going outside where it might come at me.  After querying my facebook peeps I learned it's a Luna Moth. 
 
After a quick google search, I found out it has a wingspan of up to 4.5 inches.  Not sure how big this one was as I wasn't getting too close.  Interestingly, according to google, the adult lives for only about one week and are rarely seen.  Frankly I  hope I never see another one.


Friday, June 13, 2014

Fish On

 
Fish On
 Late afternoon and time for a little fishing after work is done for the day.

 
We have three ponds on our place, the one pictured above being the largest.  The two pics above are taken with Marc in the same spot, I have just moved to different vantage points.  This pond is horse shoe shaped, with a peninsula in the middle. 
 
In it are bass and perch.  We've caught fish for dinner twice.  Catching them is fun but I draw the line at cleaning them.  Cleaning perch is a lot of work, but delicious eating.

Catch of the Day

Wednesday, June 11, 2014

Spring Brings Surprises

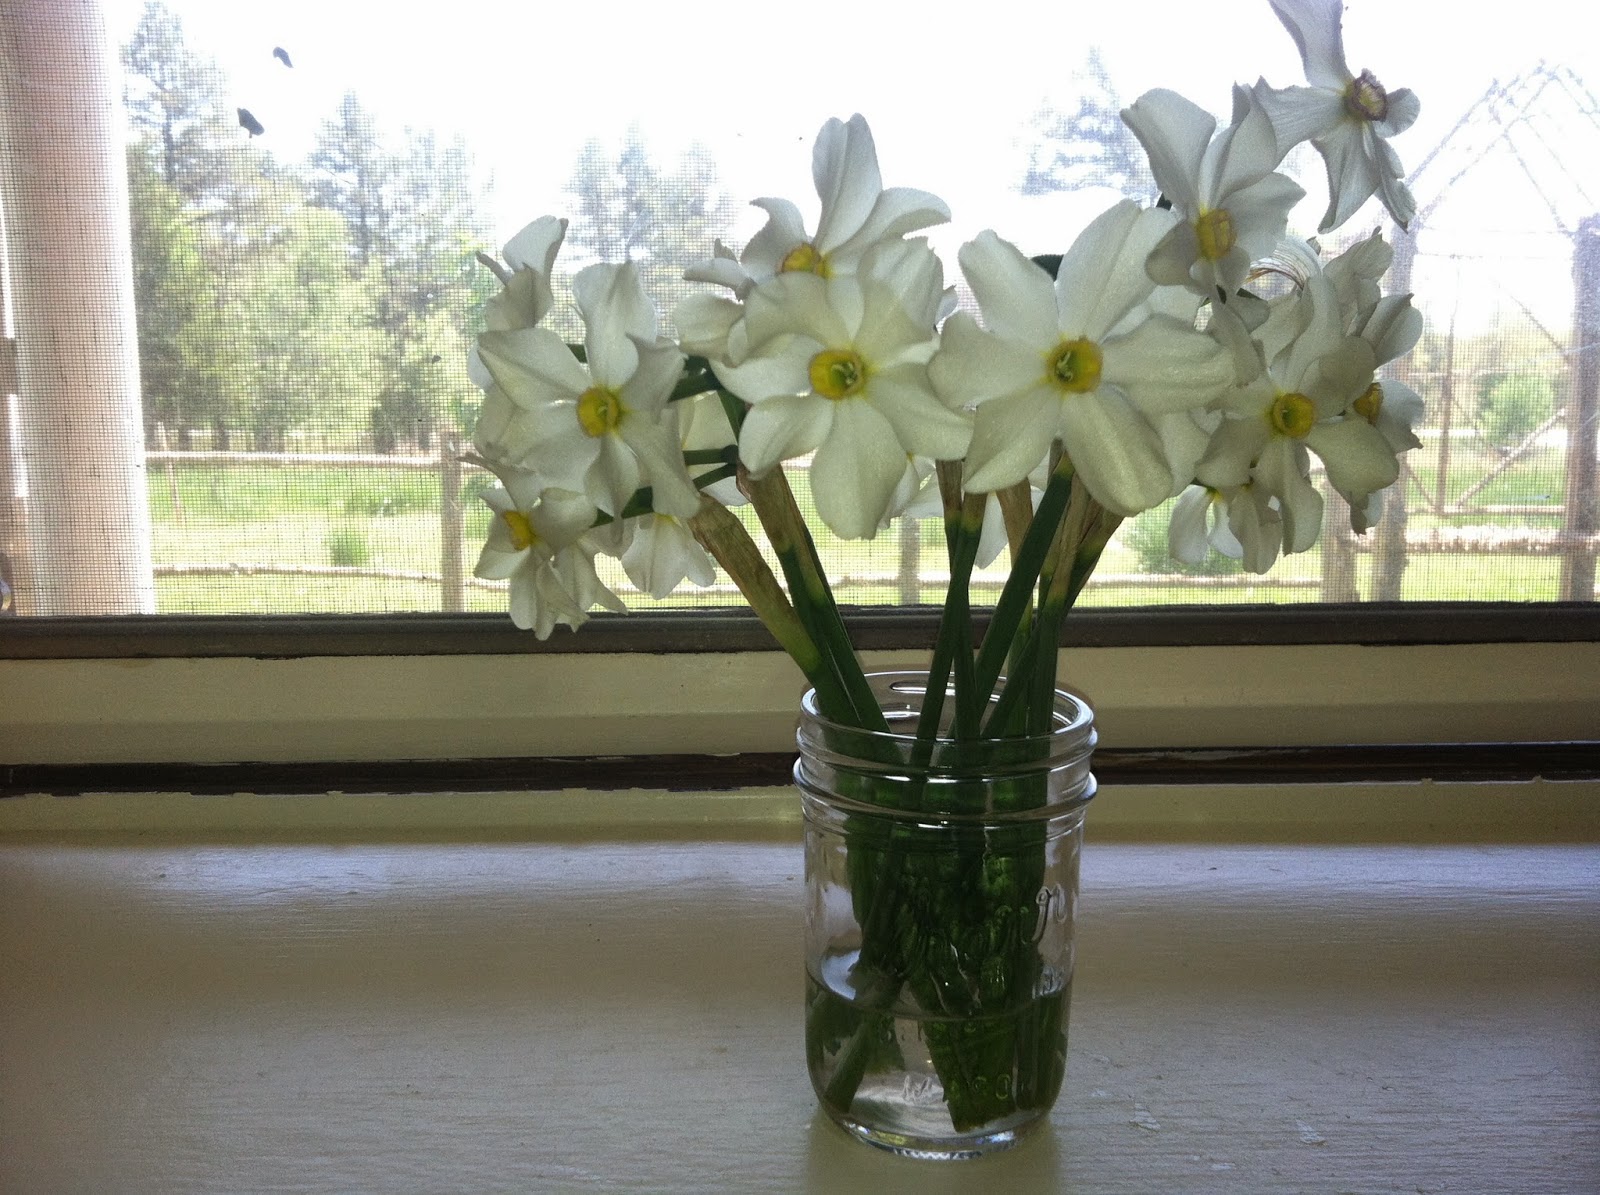
Narcissus
Each new season brings surprises here.  We noticed that quite literally on the first day of spring the frogs started singing.  Shortly thereafter bugs began to appear.  We decided at that point we really liked winter best of all.  In Texas you have bugs all year round so it never occurs to you that in some parts of the country winter means no critters.   We've decided we like a season with no bugs.
 
Cheery Daffodils
Spring brought other surprises too. Common yellow daffodils are everywhere here, even scattered in the woods. I can only guess that squirrels carried some bulbs into the woods and found that they didn't like them, dropped them, and they took root there.
 
First Spring Daffodils
My sisters who read this may recognize this statue.  When I was a kid, my Dad built a concrete, kidney shaped fish pond in our backyard.  I thought it was enough like a miniature swimming pool that I thought it might be fun to take a dip .... it was slimy and nasty and I never tried that again.  Anyway, he had this statute which is really a fountain in it.  There was a light switch at the back door and it activated the pump and water came out of the fish's mouth. I guess my parents pulled this fountain out of the pond when they sold the house and moved on.  They never had another fish pond so I guess this statue hung out in a flower garden for the next 20 or so years.  I have carried it around for the past 26 years and broke it once but Marc was able to fix it.  It has traveled from Texas to Arkansas and now resides by the well house, and lo and behold the first flowers of spring came up right beside it!
 
Marc built a rustic cedar fence and pergola in front (pics to come when I can figure out how to download them again off the "cloud"...) and I dug a SMALL clump of daffodils and transplanted them and turns out there were almost 50 bulbs in that little clump.  So I guess there are thousands on our place.  Next came Narcissus, or at least what I consider a Narcissus, pictured above.  They are very dainty flowers.  There weren't as many as the yellow daffodils.
 
Then came the purple and yellow bearded irises.  We didn't have as many here as some other folks do, but it was a nice surprise to have them pop up.  There are clumps of these beautiful flowers blooming along the highways.  Next spring I need to carry a bucket and shovel with me and dig some up.
 

Dana brought me a spray of roses that grow in her yard.  It's a climbing rose that's very prolific and hardy.  The flowers are small and don't have much scent, but lots of petals and lots of flowers.  I would really like to get cuttings started so I can have them growing here too. 

Sunday, June 8, 2014

Back by Popular Demand

Another Christening Gown Made from Mother's Wedding Gown
Now that everyone is moving to Instagram, and away from Facebook I guess I'd better just come back to my blog.  I can't add the Instagram app to my Iphone until I upgrade to the newest operating system, and I can't do that without deleting some apps to free up memory.  I NEED all the apps I have already, and since I don't know if I NEED Instagram, I guess I will just live without it.  (Third World Problems)
 
Meanwhile, back at the ranch...

I finally finished a couple of christening gown orders that had me stressed out.  The first one was for a friend of my daughter and if she wasn't pleased it would be awkward.  She wanted a traditional gown for a boy, but wanted it to be unisex for additional children.  Her wedding gown was very pretty and completely lace.  The finished product turned out nice, but maybe a bit more frilly than what she had in mind. 


Because this gown is to be used by all babies born to the couple, I embroidered the parents' monograms and their wedding date, as well as the first baby's monogram and birthdate (which you can't see in this pic) on the slip.  They can add monograms for each additional baby.


Hard to tell here (with the gown hanging from a plant hanger in the window....) but the lace overlay is ruched, front and back, so it appears to be scalloped.  The bodice, sleeves and underskirt are satin.
 
The other order that I couldn't wait to get in the mail initially sounded like a really special project.  A grandmother wanted me to make outfits for her soon to be born twin granddaughters.  She was sending her wedding gown and the other grandmother was sending hers and I would use them both to make the two outfits.  The new outfits would be presented to the mom-to-be as a surprise at her baby shower.  The grandmothers' dresses were 70's era dresses that had very little usable fabric or trims, due in part because the materials used weren't the best quality to start with and because they hadn't been stored well.  One was dotted swiss and due to the discoloration the only way it would work was to use it as an overlay, over a color such as pink.  But the grandmother wanted all white.  I worked hard to clean and lighten up the trims to use them.  In the end I had to buy fabric and just embellish the gowns.  Grandmother didn't want bonnets so instead I made bibs using the dotted swiss over pink batiste (in the pic it looks peach for some reason), with the babies' monograms in pink.  They turned out pretty in the end and I was very happy to get them out in the mail.  (For the life of me I can't figure out why the pics below won't format correctly in blogger but you get the idea.)


Monday, March 24, 2014

Handmade Gloves

 
One of the Christmas presents I made this year was a pair of gloves for Marc. Marc has very large hands and has a hard time finding gloves to fit. I have a supply of grey fleece that I bought on clearance in the remnant rack at JoAnn which I thought would make nice warm gloves. Plus, if I screwed it up, it wouldn't be a big financial loss.
 
In my mind, gloves seemed simple enough - just trace the hand, cut two pieces and sew together. Well, that might work in a pinch, but to be really functional gloves need gussets between the fingers, and they're all different sizes.
 
 
I found this pattern online - Controlled Exposure Fleece Gloves - which was written by a man. I don't know why but I found that to be rather odd.  Apparently he is into mountain climbing and couldn't find gloves he liked so he designed his own.  The pattern was easy to follow. 


The first step is to measure the hand to determine which size to make. Then cut out all these odd-shaped pieces and try to make sense of them all. Then you pin like mad. It looked like a weird science project at that point. It's a bit tricky to manuever the small pieces through the sewing machine, and the seam allowance was only 1/8" - not much room for error.
 
Mid-way through the stitching I seriously considered throwing it all away. Then suddenly I was done and it was a functional glove. Yes I was surprised.  And then I had to make the second one.
 
They turned out soft and warm and machine washable. The fabric probably cost me all of $1.00. All in all, it was worth the trouble and I know I will make them again.

Monday, February 24, 2014

Getting Ready for Spring Gardening


We started our first seedlings in early January.  It didn't take long to run out of space.  I had tried to economize by buying the smaller seed trays (from Johnny's) but it became evident fairly quickly that I would have to repot them in peat pots as they outgrew the seed trays.  Annoying. 

Anyway, we have hundreds of seedlings growing nicely.  Keep your fingers crossed that they'll all grow in the garden!  Marc already tilled two of the three gardens so they're ready to hill up and plant. 

We can't wait to get started and get some fresh vegetables growing.  But wait we must.  We are used to a USDA zone 8-9 in Texas, in which gardening could be done year round.  It's a bit different here.  We're in zone 6B.  Without a good greenhouse, nothing can be grown outside in winter.  In Texas, potatoes were traditionally planted on Valentine's Day but here it's St. Patrick's Day - a full month later!

Friday, February 21, 2014

Freeze Dried Laundry or Sublimation is Sublime


This picture shows laundry drying on a clothesline with snow on the ground.  The temp is around 22 deg. 

Since we moved, I've been hanging out all laundry to dry. We do have a dryer but it's in the other house and we haven't moved it over cause we are planning to remodel the laundry area and need to do some rewiring first. Also, I enjoy hanging out the laundry because I really like the fresh smell and the fact that it's FREE.

Hanging out laundry in and of itself is simple however, to ensure that you always have clean clothing or sheets at the ready takes some planning and work. Line drying in the summer is a breeze (pun intended) but in the winter it's a bit more work.

I had heard about "freeze drying" laundry in the winter but had never tried it and didn't know anyone who had.  I googled it and found that wet laundry does in fact dry even at below freezing temperatures. Apparently the process is called sublimation (as opposed to evaporation in warm temps).  Sublimation basically is when the water in the clothing freezes and then turns directly to a gas without going through the liquid state.  Humidity is the important factor - if it's too high the laundry may not dry completely in one day.  And yes even jeans and towels dry in freezing temps!

I keep an eye on the weather, using the Weather Channel app on my I-phone. When a nice sunny or low humidity day is in the forecast, I plan to do a lot of laundry at one time on those days.  Sometimes I wash the night before so it will be ready to hang in the morning. I need a large supply of clothespins in order to get a lot of laundry done at one time. I have to get the laundry out early so that as soon as it's sunny it will start to dry. I have to get it in before it gets dark so that the dampness won't set in. It sounds like a lot of work but I think the payoff is worth it.

The minimum washloads I do per week includes three loads of clothing, one load of sheets, one load of blankets, two loads of towels and one load of kitchen towels. According to the Cost Calculator on the website Project Laundry List, I am saving approximately $221.90 per year by line drying those 8 loads of laundry.  That's really a lot of savings. 

Of course if you line dry laundry you MUST have a Clothes Pin Bag.  If you sew and want to make one of your own, visit my Etsy shop and instantly download your pattern today!


Sunday, January 12, 2014

Modern Gray and Yellow Table Runner

I found these fabrics at the International Quilt Festival in Houston over a year ago.  I knew they would work with the new color scheme that Stephanie and Frank have in their living and dining rooms.  It only took me 18 months to make the table runner that I knew I wanted to make when I first saw them. 


I decided on a very simple pattern - 2" by 3" rectangular blocks, pieced together in strips of four random blocks, with white sashing between the blocks. I quilted it using the stitch in the ditch method.