Showing posts with label canning. Show all posts

Saturday, November 5, 2016

Paprika Peppers

Fresh Paprika Peppers
This year's tomato crop would probably seem large to most people, but it was a small one for us.  We had about 125 plants in all - about 1/3 of the usual number.  The first few trays of seedlings died (due to operator error).  So, since the harvest would be smaller, salsa was the number one product we wanted to put up.

I have shared the Salsa Recipe I use before, but for the last couple of years we have been adding something extra - about 1 tablespoon of SMOKED paprika.  This really is the best salsa we've ever made, and really the smoked paprika is the difference.

We have canned about 65 jars of salsa and that's got to last us till next tomato season. That's just slightly over 1 jar per week. In our minds, that's not much at all!

I had never tried smoked papriks until sister Dana picked some up at a really neat spice and meat processing supply shop called Townsend Spice in Melbourne, Arkansas, and ever since I tried it, I'm hooked.  I love it. 

I set out on a quest to make my own smoked paprika.  It seemed simple enough - find paprika pepper seeds, plant them, harvest peppers, smoke, dry, grind, etc.

The first challenge was finding paprika pepper seeds.  I only found a couple of different sources on the internet.  I ended up buying seeds from Baker Creek Heirloom Seeds.  They carry two varieties, and I bought the Leutschauer Paprika Pepper.  They are supposedly originally from Hungary.  The package contained only 25 seeds and almost all seeds germinated.  The plants stayed quite small (probably because we neglected the seedlings) but produced a lot of peppers.  They are a lipstick red when ripe. 
Peppers in the dehydrator
The fresh and dried peppers are too hot for my taste, even though I remove the seeds and membranes before drying.  My next experiment will be to cook the peppers before drying them.  Cooked jalapenos don't seem nearly as hot so I am hoping this will help the paprikas as well.


Wednesday, October 29, 2014

Outdoor Canning

 
We set up an outdoor canning area in order to keep the kitchen clean and cool.  I didn't relish the idea of lugging in produce across the new wood floor, cutting, slicing, dicing, washing, then blanching, draining, chilling, etc... and having that mess in the kitchen.  And since I'm pretty messy while cooking, a lot of it would have ended up on the floor.


Now, this outdoor "kitchen" is nothing more than a tent with a couple of folding tables, a gas grill with side burner, a fire pit and a couple of folding chairs.  Nothing fancy by any means.  But having it set up outside, I can run the hose and wash produce and dump the water in the grass and it flows right down into the garden, and I don't have to think about all that water going into the septic tank.   
 
I can peel and just fling the discards right into the pig bucket or on the grass.
 
The burner on the gas grill works well for heating water for blanching or even canning.  I canned carrots in the pressure canner on the burner.  To can the carrots, I used the so-called "cold pack" method.  The hardest part about the whole process is the peeling - it took what seemed like hours. 

I had some old seed I was trying to use up and figured it wouldn't germinate well so I seeded quite heavily.  I never did get around to thinning them out and before I knew it I had a million medium sized carrots.  Obviously, peeling lots of small carrots takes longer than peeling one large one.... Lesson learned here. I did manage to can up 32 pints of carrots, and froze quite a lot, not to mention ate a lot of them fresh.  Frankly I don't want to see another fresh carrot for a while....
 
Anyway, I cut the carrots into the size pieces I wanted and filled the clean jars.  Meanwhile, I brought a pot of water to boil on the grill burner.  I dropped my canning jar lids in that water to heat them.  When the water came to a boil, I moved the pot over to my work station.  I used the hot water to ladle over  the carrots in the jars, filling to within 1" of the top.  Then placed a jar lid and ring and placed each jar in the canner.  After filling all the jars with the boiling water, I added 3 quarts of the water to the canner and set the canner on the burner to heat up. 
 
 
To save on propane, Marc set up a makeshift fire pit.  He found broken chimney blocks from a chimney that had been removed from the house years ago and used them to fashion a spot for me to place a big pot or canner.  Wood is free and propane definitely is not.  In the pic above I'm blanching corn on the cob.  I blanched enough corn for 28 dinners, then more squash and zucchini, and finally about 5+ pounds of green beans, all for freezing, in one session.  I can't imagine the mess all of that would have made in the kitchen.
 
I keep a bottle of dishwashing liquid by the hose and when I'm done I wash everything and store all my supplies in a commercial food grade "lug" - ready for the next canning session.

Monday, April 9, 2012

Strawberries

Marc planted about 200 or so everbearing strawberry plants last year.  This year they have really produced a lot of fruit.  We've picked lots and there are more blooms on the plants.  We lost some in the drought but remarkably most of the plants survived.  These particular berries ("Eversweet" variety from Womack Nursery) is ok, but not the sweetest berry I've ever had.  The supposedly produce well in this area, which is why we tried them.  The idea of the everbearing type of berry seems like it would work well  - you get a steady supply of berries throughout the season.  However, even with 200 plants we only get about 1/2 gallon every other day or so.  Of course, we lose some berries to birds and bugs.  Considering that we don't use any chemicals on these berries, I think they've done really well.  I think the next time we plant strawberries we'll plant the "June bearing" type, which gives you a lot of berries over a short period. 

We've been enjoying the berries fresh as well as in strawberry milkshakes.  I made some strawberry frozen yogurt in my cuisinart ice cream maker - it was super easy.  I bought some fat free yogurt at Kroger for $1 for about a quart (the expiration date was coming up so they wanted to get rid of it), added about 2 cups pureed strawberries, sugar, milk, and vanilla.  I also poured a little of this mixture into some popsicle molds and froze them.  Rylan and Journey liked them.  I've been freezing sliced strawberries in portion sized containers and pureed berries in 2 cup size containers for making jam. 

I have tried the various pectin products available in the stores and never really liked the way the jams turned out.  I don't like jelly so I never make it.  I have seen Pomona's Pectin in the health food store but it was a little pricey, so I never tried it.  I wasn't sure if I would have any greater success with it, so I didn't want to spend the extra money on it.  They claim you can use less sugar and one box makes several recipes.  I got in on Dana's coop purchase not too long ago and they carry the Pomona's Pectin from the coop that Dana buys from, it was much cheaper than the store.  It does in fact make several batches from one box, so it really turns out to be cheaper than the store pectins.  It jelled really well, almost too well.  Next time I will not cook it quite so long. 

With the Pomona's Pectin you mix up some calcium (included in the box) with water and keep it refrigerated.  It lasts a long time (months).  Somehow this calcium makes the pectin jell better.  Anyway, other than the calcium, the method is pretty much the same as any other pectin product.  I was able to use less than half the usual amount of sugar.  With the usual recipes, you basically end up with fruit flavored sugar.  With this method, you can actually taste the fruit. 
Mash & measure the fruit

Bring fruit to boil, have sugar/pectin mix ready


Getting ready to process the jam in a boiling water bath canner

Finished jam

Rylan enjoying Grandma & Granda Krause's Strawberry Jam

Wednesday, December 21, 2011

Homemade Christmas, the Mud Room and Food Storage


{Bay Leaf Wreath}


Last year we had a Homemade Christmas. I had wanted to do it for a long time. Turns out it was a LOT of pressure. In my usual form, I procrastinated till the last minute and then didn't get everything done that I wanted to do. Also, I didn't get pictures of most of the things I made.


Some of the gifts were surprising. Those who thought they couldn't make anything came up with some great gifts. Frank made me a fleece blanket and a Texans cap/coat rack for Marc. Stephanie made Marc monogrammed socks (he goes through socks like crazy) and me a gift basket with home made bath products. Caroline made me a turquoise necklace and Marc a Texans fleece blanket. These are just some of the great gifts that were exchanged.


{View of Mudroom from Kitchen}

When we built the mud room we originally thought we would build cabinets on one wall. We decided against that and so Marc made me a large cabinet to be used as a pantry. It was my Christmas gift from him last year. It's quite large (about 3 feet wide and 7 feet tall and 2 feet deep). I use it for overflow pantry storage (since I don't have a proper pantry) and some small appliances that I don't use very often. I also store home canned items in it. I quickly filled it up, so he made another one for me this Christmas. I knew he was building it but one day I walked thru the mud room to do some laundry and when I came out I was shocked to see that he had moved the extra refrigerator out to the shed and moved the cabinet in. I had totally missed it as I walked past it several times.


{Mudroom}


{2010 Cabinet}


I've got wheat and my Excalibur wheat grinder in this cabinet, as well as some small appliances like the bread machine and crock pots, sugar, home canned foods, etc.


{2011 Cabinet}
In the new cabinet, Marc built the shelves a little closer together so I can get more smaller items stored. The very top shelf is lower on the front and higher in the back and has a lip on the front, so that I can put cans on it and they will roll forward. I have 4 cases of canned goods on this shelf already and there's room for more. I have rice, oats, beans, and more stored in this cabinet. I organized everything and took an inventory of what I had in there. I was surprised to see just how much I had stored, but there's still room for more. I've been shopping sales and stockpiling sale items and it adds up pretty quickly. After Christmas I'll do a post about home food storage or "stockpiling".


Marc even went in my craft room and found some Christmas stamps and even hand made gift cards:

Monday, November 7, 2011

Home Canning is Fun


"Home Canning is Fun" - That was the caption on a box of used canning jars that I bought at a yard sale. I'd say the box was at least 50 years old. Not much has changed in the exciting world of home canning in the last 50 years I would imagine.


I've canned just about everything you can can (may can?) in a water bath canner over the years - jams, jellies, syrups, relishes, pickles, bbq sauce, ketchup, tomatoes of all kinds, fruits, etc., but I have always been just a liiiiitle bit scared of a pressure canner. Pressure canning is the only safe way to can low acid foods such as vegetables, meats, etc.


The local stores have had some really good sales on meat lately, such as sirloin for $2.99/lb. and chuck roast for $1.97/lb. and turkeys for $0.59/lb. Now that the freezer is FULL I decided to bite the bullet and buy a pressure canner.


Tractor Supply had one for about $80 during the summer and I bought it. It sat there for a few days and I took it back. Still scared.


So during the recent meat-a-thon I went to Tractor Supply and saw that it was on "clearance" - $10 off. I found the manager and told him if he'd take another $10 off I'd buy it. He did so I got it for $59.99.


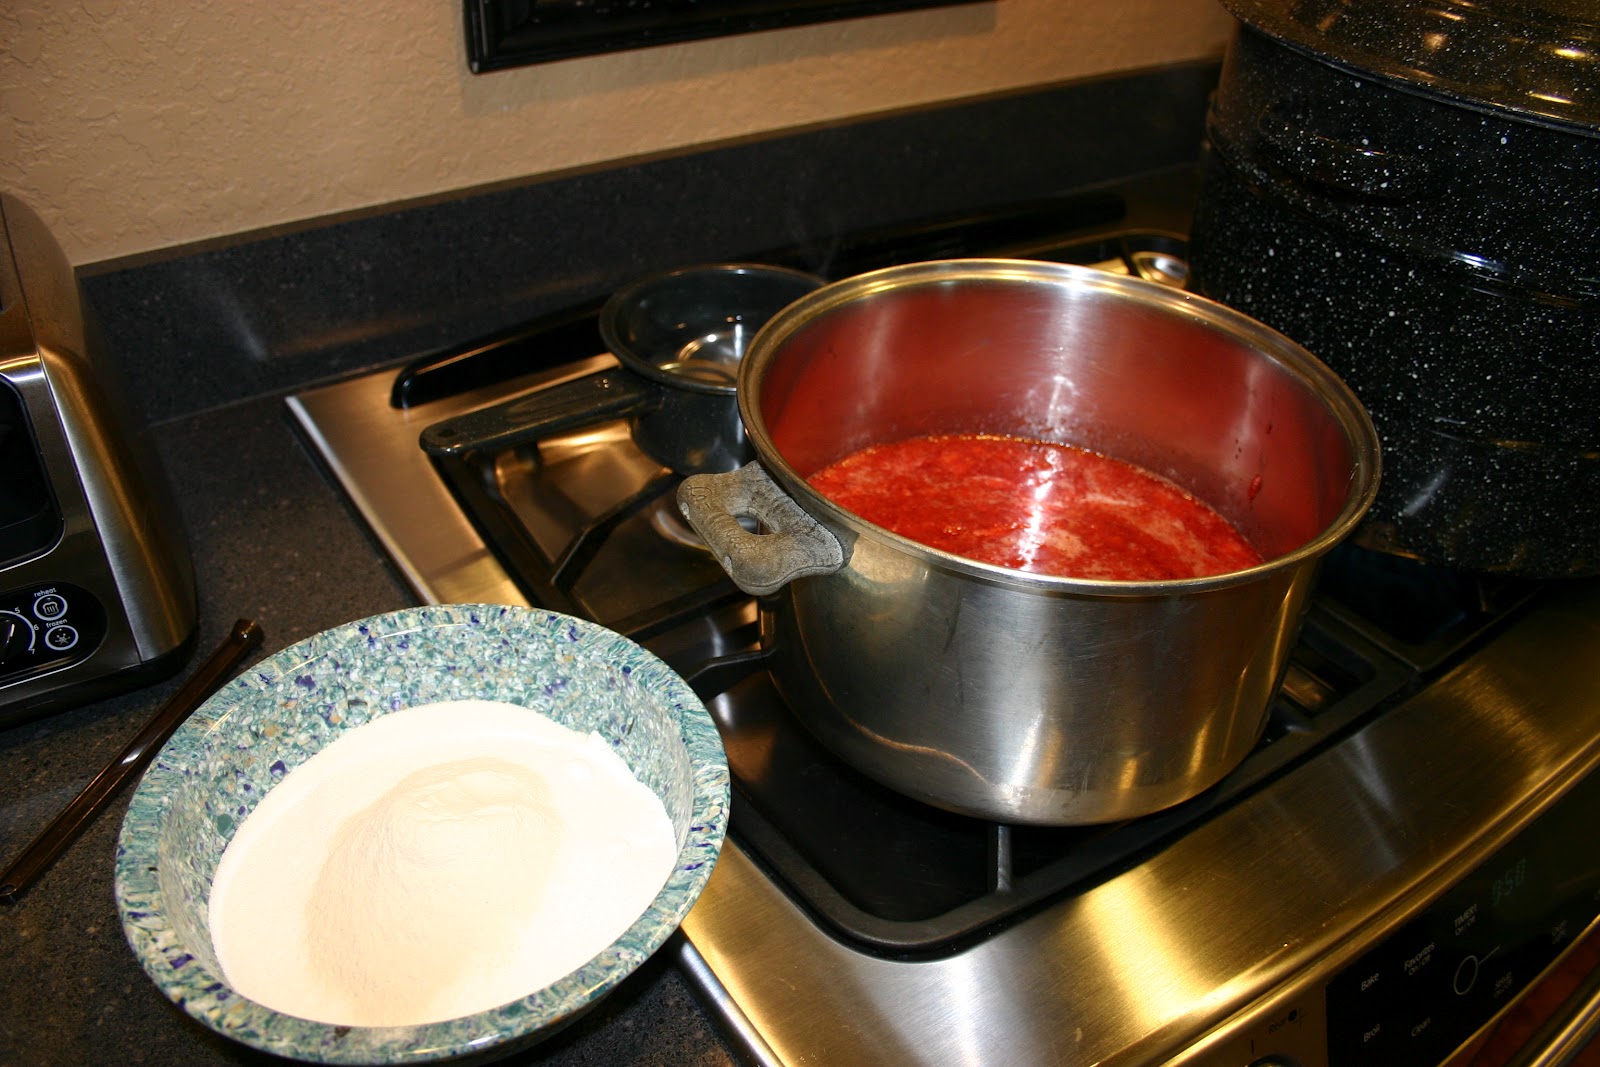
After cutting up meat for what seemed like hours, I was ready to can. I think I have the instructions memorized, I've read the book through so many times. Even so, I stopped and started the process three times. I was afraid I had missed something in the directions. Still Scared.


I literally sat and stared at that pressure dial for 75 minutes (the amount of time it takes to can meat in a pint jar). It was exhausting (mentally).


After that first round, it was a cinch. Really easy, much easier than water bath canning.


I've done three batches so far: 7 pints of chuck (stew meat essentially), 7 pints of chili (no beans, another 5 in the freezer with beans), and 5 quarts of sirloin strips. I really like the idea of home-made convenience foods. Who wants to thaw a brick of whatever at 5:30 (like we normally do)??


Assuming we don't die of botulism ; ) then this should be a real convenience to have all this precooked stuff in the pantry.


As I sat and baby-sat the pressure dial, I surfed the net. I found all manner of bizarre things on YouTube. People who are living subsistence type lifestyles (with internet and video no less) showing you how to can and live off the land, people who stockpile food for religious reasons, and then there are the Preppers.


I watched a National Geographic show a while back called Doomsday Preppers which showcased several families who are preparing for their own versions of doomsay - or as some call it "when the shit hits the fan".


So these people are stockpiling not only food but gas masks, guns, ammo, silver, gold, you name it. One family who lives in a suburban home raises tilapia in their swimming pool and fish them out every night. They eat tilapia every night. Bizarre! And they all seem to be on YouTube. Thousands of videos. Between YouTube and Pinterest I no longer need my TV.


OK, so I got a little sidetracked off my canning post. While I don't think zombies are coming anytime soon, I think it makes good sense to buy something on sale, and store it as a hedge against inflation. I mean you will have to eat and I'd be willing to bet grocery prices won't be going DOWN.

Thursday, June 9, 2011

Muscadine Daiquiri's


I have quite a bit of grape juice in the freezer from last year and the grapes are getting ripe already again. We decide to try making a cocktail like a berry margarita, only with muscadine grape juice and rum, not tequila. Ok, so it was not really like a berry margarita, but it was still good. Muscarita??

Sunday, August 8, 2010

Sisters make Salsa


During the Attack of the Killer Tomatoes Caroline, Stephanie and Caroline's friend Jackie came to make a couple batches of salsa. They each took a case home. We made up some cute labels for the jars. Labels seem like an extravagance, but they're so easy to make, look cute, and save you from wondering what in the world is in the jar and when did I make it. I have some jalapenos in the pantry that I put up last year and it's a guessing game every time I open a jar cause I don't know if they're pickled jalapenos or Cowboy Candy jalapenos cause I was in a big hurry and didn't label them.

Grape Stompin'


After working at a winery for almost 10 years, Marc's not too keen on picking or pressing any more grapes. He has a few wine grape plants scattered around and they're ready to pick. He initially planted 60 when we first bought the property, but wild hogs rooted most of them up before we moved out here. We have a bumper crop of wild Muscadine grapes this year too. They're not planted in civilized rows with manicured aisles between, they grow on trees, fence lines, etc. You have to watch for spiders, wasps, snakes etc., when picking them, and I don't like wild critters at all.
I remember when I was a teenager, Dana made some homemade wine. All I remember is that she put it in a crock in the pantry and must have used a lot of sugar, cause it was sweet. (I dipped a few sips out of the crock).

I would like to try making some home made wine, but don't really have all the equipment yet, so I guess I'll have to wait till next summer. Meanwhile, I'm juicing grapes for jelly, syrup and maybe even just to drink.

I pulled out my trusty Roma Food Mill and inserted the grape spiral and started cranking. It was incredibly easy (Sidebar: I am not getting paid by Lehman's to advertise, but I have to say, this is well worth the price. You can get the basic food mill and all extras for about $75. It saves unbelieveable amounts of time and work) The skins and seeds went out one side and the juice and pulp the other. I ran the skins through again just to be sure I got all the juice. So far I have 1-1/2 gallons of juice in the freezer.

Thursday, June 24, 2010

Attack of the Killer Tomatoes

Remember when I said I wanted enuf Salsa to last the whole year, and how I wanted to try to produce all the tomato products we needed? Well, I have 62 jars of Salsa so far, so I'm pretty good on that, and have about 42 jars of tomato sauce, so next will be stewed tomatoes. Last night I made Salsa Verde (green that is) from Yellow Pear Tomatoes. I thought it would end up yellow, but apparently the color is in the skin, which is discarded when making salsa. This was SO easy - no coring or chopping - just drop them in the hopper and grind away.

SO, this is what I saw when I walked in the door tonight. All I could say was OMG. Mary came over, walked in and said OMG. Seriously, have you ever seen so many tomatoes from ONE picking???


Monday, June 7, 2010

Salsa!

Last year our tomato crop was sad (due to various operator errors...) and we had about enough tomatoes for a couple batches of salsa. We rationed it for as long as we could. It was a sad day when we ran out.

This year I stood in the garden after pulling a turnip and vowed, as God is my witness, I WILL have salsa this year!

Seriously though, my goal is to grow and preserve EVERY tomato product we will use for the next 12 months. Tall order? Yeah, maybe. I've never made tomato paste - not sure if it's even feasible at home. So maybe I won't try that one. But I refuse to pay $1.00+ for even one can of tomatoes this year.
Marc is even on board with making home made ketchup. He's never tried home made ketchup before. He likes all things pre-prepared - Heat & Eat. He probably won't like home made ketchup. I made it once years ago and while good, it's not as smooth as store bought.

I made the first batch of Salsa last night. It took about 3 hours from start to finish, which is pretty good. The OLD method involved scalding tomatoes, peeling and coring them while still hot (ouch), then chopping in the food processor. What a mess!!

I have a gizmo called a Roma Food Strainer & Sauce Maker. I bought this from Lehman's online. (I had one many years ago that I got with S&H Green Stamps!! I guess I sold it in a yard sale somewhere along the way). Anyway, it looks somewhat like a meat chopper. It has a big bowl that holds the food, a handle that you crank and an auger kinda like a meat chopper. But instead of knife blades, it has cone shaped "screens" that the food travels through. Here's the cool part: the good stuff (pulp) comes out one end and the stuff you don't want (peel, seeds) goes out another. No peeling tomatoes!!! It's super easy to use, you just cut up the tomatoes and throw them in. No cooking or peeling!


Roma Food Mill

The Roma can be purchased with various screens - at an additional charge of course. It comes with the basic puree screen. I've used this to make tomato sauce and "apple" sauce (from pears). The additional screens are: grape, berry (it takes those pesky little seeds out of dewberries!!), pumpkin and Salsa. Pumpkin works for other large seeded things like butternut squash.


Close up view of the soon-to-be-Salsa

The Salsa recipe I used came from Mary who got it from Haven Wisnoski. It's really good. Here's Haven's recipe:

  • 1 1/2 Gallons chopped tomatoes (liquid drained)
  • 3 large chopped onions
  • 8 bell peppers/poblanos chopped
  • 1 quart jalapenos chopped (I don't seed all of them)
  • 5 cloves garlic chopped
  • fresh cilantro
  • 1 tbsp. garlic powder
  • 4 tbsp. salt
  • 1 tbsp. pepper
  • 1 tbsp. crushed red pepper
  • 2 tbsp. sugar
  • 1 tbsp. veg. oil
  • 1/2 cup vinegar
  • 1 tbsp. cumin
  • 1 tsp. paprika
  • 1 tsp. chili powder
Put all ingredients in a large pot- bring to a rolling boil- turn down heat and simmer for 20 minutes. Put in sterile jars and seal makes approx. 17 pints

That's a lot-a Salsa!

I increased the vinegar to 1-1/2 cupes and processed the jars in a water-bath canner for 15 minutes. All of the veggies were grown in our garden.

The finished Salsa