
Saturday, August 14, 2010
Sunday, August 8, 2010


Sisters make Salsa

During the Attack of the Killer Tomatoes Caroline, Stephanie and Caroline's friend Jackie came to make a couple batches of salsa. They each took a case home. We made up some cute labels for the jars. Labels seem like an extravagance, but they're so easy to make, look cute, and save you from wondering what in the world is in the jar and when did I make it. I have some jalapenos in the pantry that I put up last year and it's a guessing game every time I open a jar cause I don't know if they're pickled jalapenos or Cowboy Candy jalapenos cause I was in a big hurry and didn't label them.
Grape Stompin'

After working at a winery for almost 10 years, Marc's not too keen on picking or pressing any more grapes. He has a few wine grape plants scattered around and they're ready to pick. He initially planted 60 when we first bought the property, but wild hogs rooted most of them up before we moved out here. We have a bumper crop of wild Muscadine grapes this year too. They're not planted in civilized rows with manicured aisles between, they grow on trees, fence lines, etc. You have to watch for spiders, wasps, snakes etc., when picking them, and I don't like wild critters at all.
I remember when I was a teenager, Dana made some homemade wine. All I remember is that she put it in a crock in the pantry and must have used a lot of sugar, cause it was sweet. (I dipped a few sips out of the crock).
I would like to try making some home made wine, but don't really have all the equipment yet, so I guess I'll have to wait till next summer. Meanwhile, I'm juicing grapes for jelly, syrup and maybe even just to drink.
I pulled out my trusty Roma Food Mill and inserted the grape spiral and started cranking. It was incredibly easy (Sidebar: I am not getting paid by Lehman's to advertise, but I have to say, this is well worth the price. You can get the basic food mill and all extras for about $75. It saves unbelieveable amounts of time and work) The skins and seeds went out one side and the juice and pulp the other. I ran the skins through again just to be sure I got all the juice. So far I have 1-1/2 gallons of juice in the freezer.
Journey's Special Christening Gown

the little angel
Stephanie was shocked when I suggested making Journey's christening gown out of her wedding gown. I had to talk her into it really. But when she saw her little angel in the dress she had worn exactly 6 years and 1 day before, tears came to her eyes.

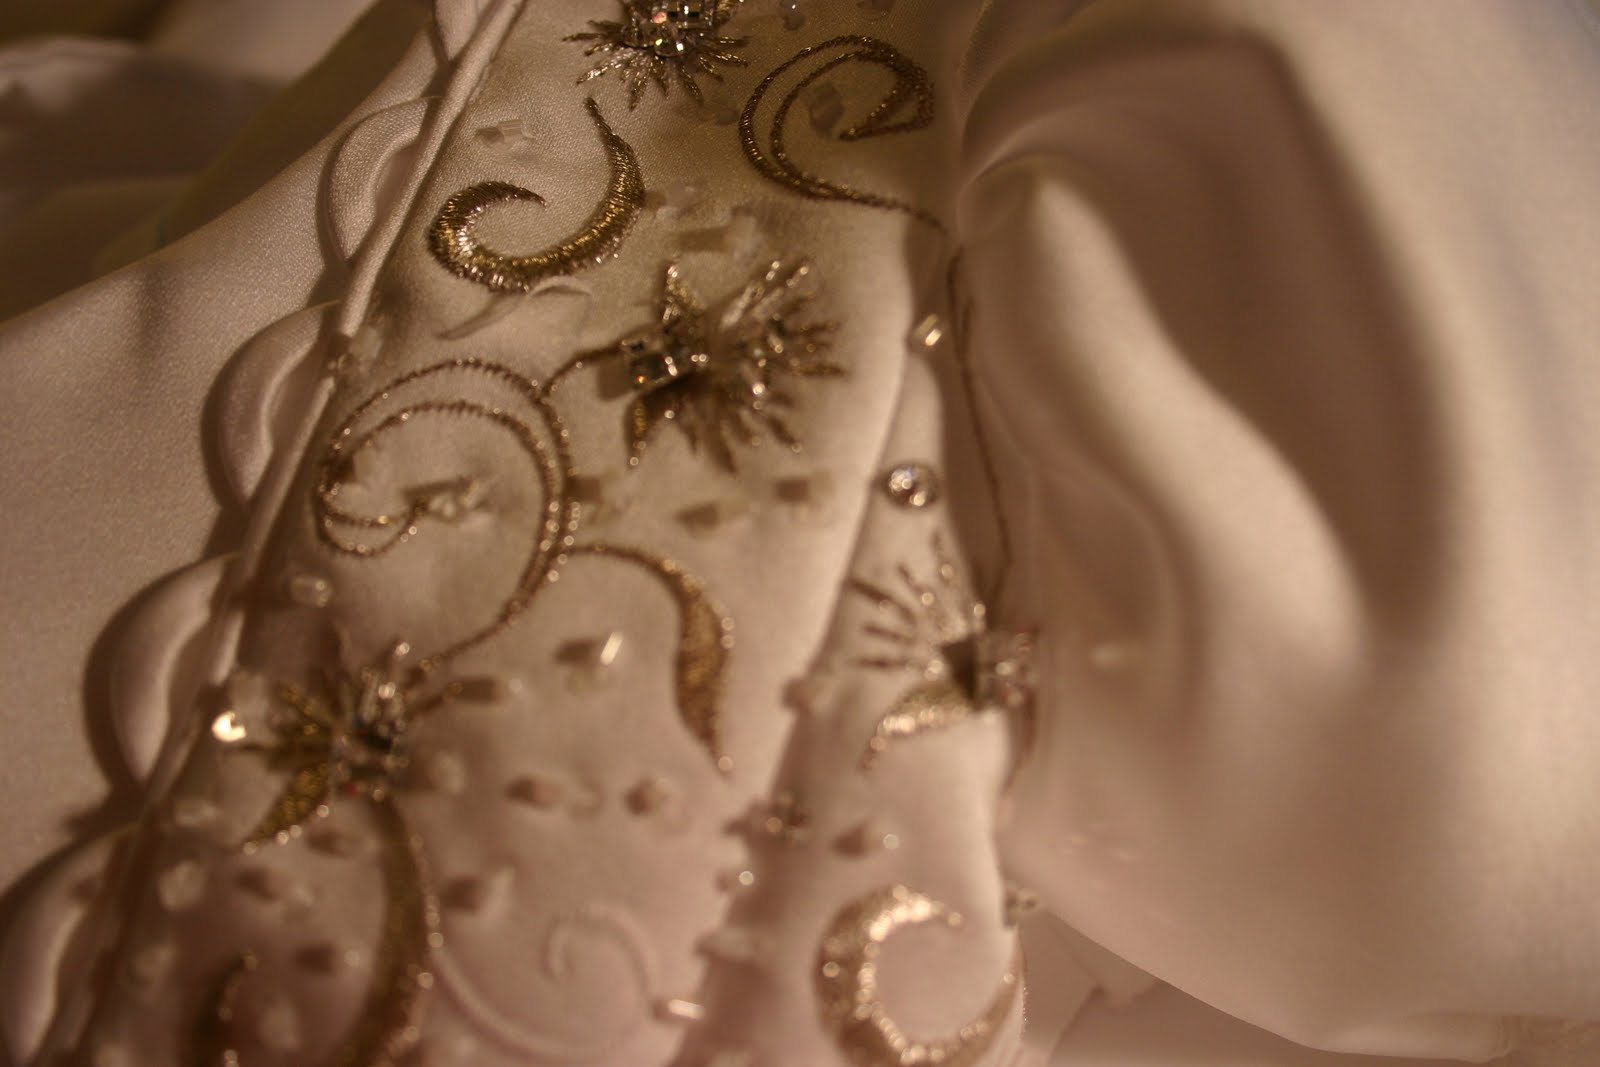
wedding gown
Stephanie's dress featured an A-line skirt with corset back. It was a beautiful dress, but there wasn't a lot of fabric in perfect condition to work with. Imagine how hard it was for me to cut into after spending $$$ on it!! As I started to take it apart I was surprised to find that the entire dress was completely lined with self fabric! Then there was an interlining. I quit counting the boning strips at 40. I'm sure it was quite hot and heavy to wear.

bodice construction
As I looked at the back of the dress, with the loops for the corset ties sewn in place, I wondered how I could use them in the christening gown. The picture above shows my pattern piece laid over the two back sides of the of the dress. The loops are forming a "V" shape on the bodice front. In the center I placed the "modesty panel" from the back of the gown (which was already finished!) and after stitching them all together, cut my bodice front. Perfect!! The wedding gown featured a beautiful silvery-bronze embroidery with Swarovski crystals, bugle beads and sequins. With all of that going on, the christening gown didn't really need any embellishments. I made simple puff sleeves with entredeaux and lace and silk satin ribbon to gather. The wedding gown had no lace at all, so I did purchase the entredeaux, lace, and ribbon (and cheated a little by buying satin covered buttons). Otherwise, the entire christening gown was made from the wedding gown.
Because the wedding gown was A-line, I had to cut the christening gown skirt in panels (3 for front and 3 for back), and add a hem band at the bottom, to get enough fabric. I do have enough scraps left over to make a little boy's outfit if needed in the future.
The bodice of the gown was so detailed and beautiful. I was able to make darts to use the entire bodice as Journey's bonnet.
The gown featured embroidery on one side, just below waist pleats. I used that flourish of embroidery to cut little slippers for Journey. I used a scallop embroidery stitch on the machine to finish all edges and added silk satin ribbon to tie. I embroidered the soles of the little shoes with her name and date of baptism.

sleeve detail
bodice details
Baby Boy Christening Outfit

Journey's cousin Kaden was baptized not long after Journey. Kaden's mom, Brandy, asked me to make him a christening outfit using her wedding gown. I have never made boy's clothes before! It was hard to do because I couldn't add a bunch of lace, ruffles, etc.! Brandy asked me to incorporate some of the lace from her dress as well as something blue.
Her dress had a chapel length train that was completely re-embroidered scalloped lace. I hope they have a girl next and ask me to make a dress for her, because it will be beautiful!! I used some tiny lace medallions with some seed pearls and appliqued them to the collar of the outift. I used blue silk ribbon for the bonnet/cap ties and added some of the seed pearls to the ties. The entire outfit, including the lining, was made from Mom's wedding dress. It turned out pretty, if I may say that about a boy's outfit.
I can't think of a better way to make use of a wedding gown. You could save it and hope that your daughter would wear it, but styles change, and the likelihood of its being used as a wedding dress again is slim. A christening outfit is special, but making it from mom's wedding gown really makes it an heirloom.

Sunday, August 1, 2010
A New Swimsuit for Journey

In the recent "Blue" issue of Sew Beautiful magazine there was a little gingham two-piece swimsuit featured, including a free pattern. I knew it would be adorable on Journey.
I had a piece of turquoise seersucker that I'd been saving for a while. I had enough to make the swim suit as well as a hat. The suits in the magazine and the ones featured on the Sew Beautiful blog all had monograms on the bodice. While I love monograms, I wanted something fun and playful. I found a seahorse on the Embroidery Library website (http://www.emblibrary.com/). I'm on their email list and one of the latest emails was all about 'beachy' patterns. Here's a close up of the seahorse:

I love the combination of turquosise and lime green and naturally Journey needed hot pink, so I combined all those colors on the seahorse.
I needed lime green Ric Rac and guess what - the only store that carried it was Buttons 'n' Bows in Houston! I bought all they had. I looked at Wal-Mart, Hobby Lobby, a quilt store, even JoAnn's!! How frustrating! Buttons 'n' Bows has a lot of nice things, but they're not exactly close to me! I guess I need to plan ahead and order everything online from now on. . .
I changed the pattern/design just a little bit. I tapered the ends of the lower bodice ruffle to match the upper ruffle and I made two ruffles for the the pants, each open to the sides, instead of one that opens to the back. I found that the directions in the magazine were kind of vague, so if you decide to sew it, be sure to read it thoroughly. You have to know how to construct a garment before tackling this, since the instructions are so skimpy. All in all, I really liked the way it turned out.
Subscribe to:
Posts (Atom)