Showing posts with label cooking. Show all posts

Saturday, January 28, 2017

Family Recipes and Kitchen Memories

Family Cookbook in the making
I've been wanting to create a family cookbook for years.  I started typing it in 2011 and just finished it in time to give it as a gift this Christmas!!! When I first came up with this idea - many years ago -  I had sent emails to family members asking for recipes but only Dana wanted to participate.  Between the two of us we compiled recipes that we remembered our parents and other family members making, along with memories relating to holiday meals and cooking in general.

When the idea was hatched we thought about how to actually put it together and we thought maybe a three-ring binder would work because we could find them at any store and we'd be able to add recipes in the future.  Between then and the time it was finished, Dana had purchased a brand new, unopened binding machine, along with all the binding combs we could ever use, for about $20 at a teacher supply store sale. 

I knew I wanted a retro, 50's feel to the cookbook, so I used red gingham paper from Hobby Lobby for the front and back cover.  I used white cardstock for the section dividers and the title on the front.  I didn't have a font that I liked on my computer so I searched the internet for a suitable font.  

I'd never downloaded a font before so I didn't know how hard it would be.  Turns out - it was super simple!  I used the Remachine Script  font from DaFont.com.  It was free for personal use.  The download instructions on DaFont was very easy to follow.  Now that font is installed on my computer and can be used for anything.  I used that font for the cover page and all divider pages.

I typed all of the recipes in Microsoft Word.  Once I had them all typed in, I added a Table of Contents.  Once that was done, I could add recipes or move them around and re-build the table of contents.  It was super convenient.

Using the binder is pretty simple.  To punch holes in the sheets  you just center the sheets to be perforated, set the paper stop, and pull down on the handle. 

I made the cookbooks 8.5" by 5.5" (half a letter size sheet of paper).  The covers are a bit larger.  I used black cardstock to make the covers a bit sturdier.  I used glue sticks to adhere the red gingham paper to the cardstock, then I laminated all the covers.  

Since the covers are a bit larger than the paper, I had to reset the paper stop on the binder to punch the holes in the center of each cover.  Then I trimmed the binding combs to match the number of holes in my books and bound them.
Punching Holes

Of course we found some typos once it was printed and assembled, even though I'd previously checked everything.  Oh well, I guess now it will be a simple matter of making new editions in the future.


Saturday, December 8, 2012

Homemade Granola and Granola Bites

Granola Bites


I like Granola, but I'm pretty particular about what's in it.  I don't like raisins in it but I do like pecans.  I also don't like those little puffed rice thingys that are in some granolas.  It's really hard to find a store-bought granola that I like that's priced well.  After much research and experimentation I found a basic recipe that I like.  Each time I make it I add different "extras" depending on what I have on hand.

The original recipe I found came from Hillbilly Housewife.  It's called Honey Granola. You can read her recipe here.  She has tons of other recipes too, including recipes using your homemade granola. 

I noticed when looking at the ingredients in the storebought granolas I like that they use Brown Rice Syrup, so I ordered some from Country Life Natural Foods.  I used it in my granola today and replaced most of the honey called for with the brown rice syrup. 

I also replaced the butter with Coconut Oil in my recipe today.  This is the first time I've ever bought it and have been using it in various recipes.  It's expensive, but supposedly healthier than other fats. 

So here is the recipe for the Granola I made today:

My Homemade Granola

3 Cups dry Oatmeal (I use quick)
1/2 Cup Coconut Oil
1/2 Cup Brown Rice Syrup
2 tsp. Vanilla
1/2 tsp. Maple Flavoring
1/4 tsp. sea salt
1 tsp. cinnamon
1/2 Cup Pecans
1/2 cup sunflower seeds (raw)

Measured the coconut oil in a glass measuring cup and melt in the microwave.  Add the brown rice syrup and flavorings to oil and mix well.  In a large bowl, combine dry ingredients then add the liquids; mix well.  Pour out onto a baking sheet (I use a large stoneware pan).  Cook at 350 deg. for about 15-20 minutes.  Remove from oven, allow to cool.

I noticed that the granola seemed to clump together more so with the brown rice syrup than it does with the honey, which I like.  It turned out delicious.

I usually put flax seeds in my granola, but somehow managed to forget it this time, even though it was sitting right on the counter.

I like to eat granola on top of plain Greek Yogurt.  It's one of my favorite breakfast foods.

I also like Granola Bars.  If you read the ingredient list on most of them, there's all kinds of stuff you can't pronounce and tons of sugar.  I like a chewy granola bar.  Stephanie found this recipe for No Bake Energy Bites which is very much like a chewy granola bar, but in a smaller bite size version (Since I found this recipe I see that they've added lots more combinations to the website!).  The basic recipe on that site uses ingredients that most people have on hand.  I tweaked it to utilize what I like and I like my recipe a lot.  Even my husband, who is wary of "natural" (i.e., "tree bark") likes these for a quick snack.  The original recipe calls for peanut butter.  I've made them with peanut butter and I like them, but I have a lot of sunflower seeds, so I use those instead.  Here's the recipe I made today:

Granola Bites

1/2 cup toasted sunflower seeds*
1/2 cup toasted flax seeds

Process the toasted seeds in a food process until a fine meal forms. 

Combine seed meal with:

1 cup dry oatmeal
1/2 cup mini-carob chips*
2/3 cup Dried Cranberries*
1/3 Cup Brown Rice Syrup*
1 tsp. vanilla

* ingredients are from Country Life Natural Foods

Mix well.  Use a small scoop/melon baller to form balls.  Makes about 30 1" balls.  That sounds like a lot, but they go pretty quick - they're really good!

I mixed my ground seeds while they were still pretty hot from the toasting process so my carob chips melted, which I actually like a lot.  This way, the carob flavor is mixed throughout.

I've made variations of this recipe many times, changing it up depending on what I have on hand.  As long as you keep the wet/dry ratios about the same, you can use whatever you want.

If you make Granola Bites right after making Homemade Granola, you can just use the same bowl and utensils.  No need to dirty up anything else.  Plus they have a lot of ingredients in common, so it's all out on the counter anyway.

I could have toasted my seeds in my stoneware pan in the oven, but I'm notorious for leaving stuff on/in the stove and getting involved in other things and burning stuff.  So I like to toast nuts in the popcorn cooker.  It constantly stirs them so there are no scorched spots.

Homemade Granola Toasting in the Oven


Toasting Seeds


Monday, October 1, 2012

Save with the Food Saver

If you've read some of my posts about grinding your own hamburger or other food preservation posts, you know that I buy foods in bulk when on sale.  Well, you've got to do something with all that food.  Freezing is by far the easiest method of storing it on the front end.  Previously I bought so-called "freezer bags" (i.e., Zip-Loc) but found them to be lacking for long term storage.  I had wanted to buy a Food Saver for quite some time but put it off because they're really expensive and I wanted to be sure I got one that had all the features I wanted and for the right price.

After researching various models and brands on the web, I found that the better models have a moist/dry setting which helps when you are packaging wet foods, such as blanched squash or meats.  I also watched some YouTube videos showing how to use it and learned some tips and tricks.

I bought the "Gamesaver Bronze" model.  It was about $169.00.  It has a "camo" design on it which I don't care for, but since I keep it in a cabinet I guess it doesn't matter. It has a fast and regular setting, a moist/dry setting, a separate vacuum/seal setting and a seal only setting. It also has a removeable drip tray, a built in cutter, storage compartment, and a vacuum tube for use with accessories.

I also ordered a jar sealer (sold separately of course) which fits on the top of a mason jar. They have two - one for regular mouth and one for wide mouth mason jars.  The regular is $8.99 and the wide is $9.99.  You attach the tube to the FS, place the jar sealer on a jar on which you've placed a canning jar lid (no ring) and it sucks out all the air.  You don't "can" wet foods in the traditional sense with this method, but it works to extend the freshness of dry foods like nuts, seeds, beans, etc.  You can also vacuum seal refrigerated foods to help preserve them a longer.  Again, it doesn't "can" foods.  But it works so well you have to use a can opener to get it open.  You could also use it to prepare jarred foods for freezing.  Once you sign up on their website you get occasional emails with free shipping, or discounts on bags.  I bought the jar sealer and got free shipping.

The FS website claims that foods keep up to 5x longer. I was skeptical at first, but my research shows that is true. I found this information to be corroborated in the Ball Blue Book and several state college extension websites.

Before buying the FS I was limited to using Zip Loc freezer bags or freezer paper. I can't find freezer paper at the local Wal Mart. I found some recently at a quilt store if you can believe it and paid $4 something for it. If you are only buying and freezing small quantities of foods you probably won't have an issue with freezer burn, but if you buy meat in bulk or raise your own vegetables you will find that Zip Loc bags aren't the answer.  They do let in vapor.  Before buying the FS, twice in one month we pulled some steaks out of the freezer that had been stored in Zip Loc bags which were freezer burned. A couple of episodes like this and the Food Saver will pay for itself.

The very first thing I sealed with the FS was pecans. I always check the mark down section at Kroger when I shop and I found chopped pecans for $1.25 per 6 oz. bag. The regular price was $4.65! The expiration date was many months out. I packaged them in FS bags, three to five bags per FS bag. I pierced the original bag first to make sure all the air came out. I labeled the bags with the expiration date. If I haven't used them by that date I can drop the bags in the freezer for long term storage to be on the safe side.  I bought 20 of the bags and realized I should have bought all of them. I really like pecans, but they're so expensive! This way I have them ready to use. I saved $3.40 per bag, which totals $68 in savings for the 20 bags.  You can see how the Food Saver will pay for itself over time. 

I also learned that I can seal Mylar bags or reseal chip bags (which are usually mylar). I have sealed up wheat and beans in Mylar bags for long term storage, since I have a pretty good supply of wheat in short term storage.  It doesn't vacuum the Mylar (I think because it's too thick), only seals it so you still have to use oxygen absorbers.  To be on the safe side, I add a second seal about 1/2" from the first seal. Mylar bags can be purchased on the internet, but I get them at the Mormon cannery for pennies, so much cheaper than anywhere else. 

To freeze meats or moist vegetables for long term freezer storage it works best if you pre-freeze the foods.  You load up the bags and set them in the freezer till partially or completely frozen.  This way any liquids don't get sucked up  into the sealer.  This is what causes most seal failures.

In the pic below you can see two chicken breasts that I've prefrozen.  I am sealing them in this pic.  Also you can see the bag storage area and cutter. 

The bags can be somewhat expensive, however, they do keep foods 5x longer than a zip loc or freezer paper wrap.  They can be purchased in pint, quart, gallon, "portion-size", or on one long continuous roll which you cut to make your own custom sizes.  This is what I use. Also, they can be reused.  I only reuse the ones that do not contain meats.  I hand wash, air-dry and put them away for future use.  You can boil the foods directly in the bags as well.  They now make a bag that you can microwave in, which would be convenient for corn on the cob or other veggies.

Tuesday, April 10, 2012

Update to my Ground Beef Post

If you need any additional reasons to grind your own ground beef . . . .

The other day we were going to be taking pictures in the bluebonnets right at dinner time and I needed something really fast for dinner so I thought I would make sloppy joes & french fries.  Rylan and I went to the super Wal Mart for a few things.  I thought I would kill two birds with one stone and get groceries and the other things I needed in one place.  I don't like Wal Mart super centers.  The stuff is in a lot of odd places (designed to keep you circling, picking up more items I'm sure) so I can never find what I want.  Also, they only offer what they get a good price on, so I can't always find what I want.  I read that they use some sort of gas in their meat trays to make the meats stay red longer. I try to avoid wal mart really.  But in the interest of saving time, I went there.

I got all the stuff I needed, then rounded the bend to the meat section.  I found some ground beef that was only 4% fat.  It said it was " Natural* "  Why the asterisk??  I turned the pkg. over and it said it was "ground beef with natural flavorings".  I ask you - why do you add "flavorings" to meat???  To top it off, this meat was a product of - USA, Canada AND Mexico!!! 

When I grind beef, I use one CUT (like a sirloin roast), from ONE COW.  This meat from Wal Mart could possibly have come from three different COUNTRIES, and who knows how many different animals.  Gross!!!  Needless to say, I put it back and left!

It's really sad that so many consumers are like cows lining up for slaughter.  They think they're getting the best price and they head to the largest store with the largest advertising budget.  They blindly throw stuff in their shopping baskets and head for the door.  It reminds me of that 70's movie - Soylent Green!

Monday, April 9, 2012

Strawberries

Marc planted about 200 or so everbearing strawberry plants last year.  This year they have really produced a lot of fruit.  We've picked lots and there are more blooms on the plants.  We lost some in the drought but remarkably most of the plants survived.  These particular berries ("Eversweet" variety from Womack Nursery) is ok, but not the sweetest berry I've ever had.  The supposedly produce well in this area, which is why we tried them.  The idea of the everbearing type of berry seems like it would work well  - you get a steady supply of berries throughout the season.  However, even with 200 plants we only get about 1/2 gallon every other day or so.  Of course, we lose some berries to birds and bugs.  Considering that we don't use any chemicals on these berries, I think they've done really well.  I think the next time we plant strawberries we'll plant the "June bearing" type, which gives you a lot of berries over a short period. 

We've been enjoying the berries fresh as well as in strawberry milkshakes.  I made some strawberry frozen yogurt in my cuisinart ice cream maker - it was super easy.  I bought some fat free yogurt at Kroger for $1 for about a quart (the expiration date was coming up so they wanted to get rid of it), added about 2 cups pureed strawberries, sugar, milk, and vanilla.  I also poured a little of this mixture into some popsicle molds and froze them.  Rylan and Journey liked them.  I've been freezing sliced strawberries in portion sized containers and pureed berries in 2 cup size containers for making jam. 

I have tried the various pectin products available in the stores and never really liked the way the jams turned out.  I don't like jelly so I never make it.  I have seen Pomona's Pectin in the health food store but it was a little pricey, so I never tried it.  I wasn't sure if I would have any greater success with it, so I didn't want to spend the extra money on it.  They claim you can use less sugar and one box makes several recipes.  I got in on Dana's coop purchase not too long ago and they carry the Pomona's Pectin from the coop that Dana buys from, it was much cheaper than the store.  It does in fact make several batches from one box, so it really turns out to be cheaper than the store pectins.  It jelled really well, almost too well.  Next time I will not cook it quite so long. 

With the Pomona's Pectin you mix up some calcium (included in the box) with water and keep it refrigerated.  It lasts a long time (months).  Somehow this calcium makes the pectin jell better.  Anyway, other than the calcium, the method is pretty much the same as any other pectin product.  I was able to use less than half the usual amount of sugar.  With the usual recipes, you basically end up with fruit flavored sugar.  With this method, you can actually taste the fruit. 
Mash & measure the fruit

Bring fruit to boil, have sugar/pectin mix ready


Getting ready to process the jam in a boiling water bath canner

Finished jam

Rylan enjoying Grandma & Granda Krause's Strawberry Jam

Monday, February 27, 2012

Make Your Own Ground Beef


Why you ask? Here's why I do it:

1. You'll know what's really in it. If you haven't heard about "pink slime" or "mechanically separated" meat, I challenge you to google it and learn, if you dare. I ground about 7-1/2 pounds of chuck roast today and my ground beef is 100% ground chuck and nothing else.

2. It's WAY cheaper. I watch the sales and then stock up. If you start to pay attention to grocery store cycles, they have sales on certain items periodically. The trick to saving money is to buy enough when it's on sale to last you till the next sale. So this week Kroger has boneless chuck roast for $1.99 per pound. This is when I buy a bunch and grind it up. If they have a limit, then I go more than once in a week. Right next to the roasts they have Ground Chuck for $1.99 per pound. You might look at that and think, why would I want to go to all of the trouble of grinding my own when it's already ground up for the same price. However, if you look closely the Ground Chuck is 73% lean. This means that it's TWENTY SEVEN PERCENT FAT. They literally add fat to it. They jack up the price of the "lean" ground chuck and add that fat to the cheaper ground chuck. Anyway, what I'm trying to say is that isn't a bargain when you are going to throw away (by draining off the fat) 27% of what you're paying for.

3. It's easier than you think. You don't need a commercial meat grinder. I use a grinder attachment on my Kitchen Aid Mixer. You can sometimes buy these on sale for $55. It's WELL worth it. I use it all the time.

4. It's fresh. I read that Wal Mart uses some type of gas to keep its meat looking pink and fresh. Just because it LOOKS fresh doesn't mean it really is. I know that everything I used was clean and the meat went into the freezer right away.

Here's how I do it. I use a Kitchen Aid Mixer with the grinder attachment. I try to get all my cuts to about 3/4" in size. This way, they move through the grinder quickly. I cut roasts into 3/4 slices, then the slices into 3/4 strips, then 3/4 dices, or thereabouts. I do trim off all gristle and sinew and any big chunks of fat. I don't worry much about little bits of fat marbled into the meat. The whole process goes faster if the meat is very cold. Here's a tip: use a piece of foil to "drape" over the opening of the grinder to deflect any liquid that spurts out to help keep it off the floor and you. Marc came up with this idea.

The grinder attachment comes with a couple of different plates (the holes are different sizes). I use the small one for ground beef and a mid-size one for chili beef.

If we're going to want burgers to cook on the grill, I will add some fat back to the ground meat so that the burgers won't fall apart on the grill. The fat cooks out for the most part. However, if I'll be making basic ground beef or meatballs to cook in the house, I try to eliminate as much of the fat as possible.

Today I ground about 7-1/2 pounds of ground chuck. Out of this I made 6 burgers, 3 pkgs of ground beef and about 47 meatballs.

To make burgers, I use a 1/2 cup measuring cup to measure the ground beef for each portion. This is a great size for grilling, but if you will be using the patties smothered with onions and mushrooms on the stove top you might want smaller portions, say 1/3 cup each. I line a cookie sheet with parchment or freezer paper and measure out 6-1/2 cup portions of ground beef, then flatten them out. I then place the cookie sheet in the freezer (unwrapped) to "quick freeze" the patties. In about two hours or so (or whenever I remember them) I go back and pull out the cookie sheet and if the meat is frozen, I peel the burgers off the paper and put them in a plastic freezer bag and label. What's great about this method is that the burgers won't stick together cause they are individually frozen. I just pull out the number of burgers I need for a quick meal. I don't even have to think about defrosting anything.

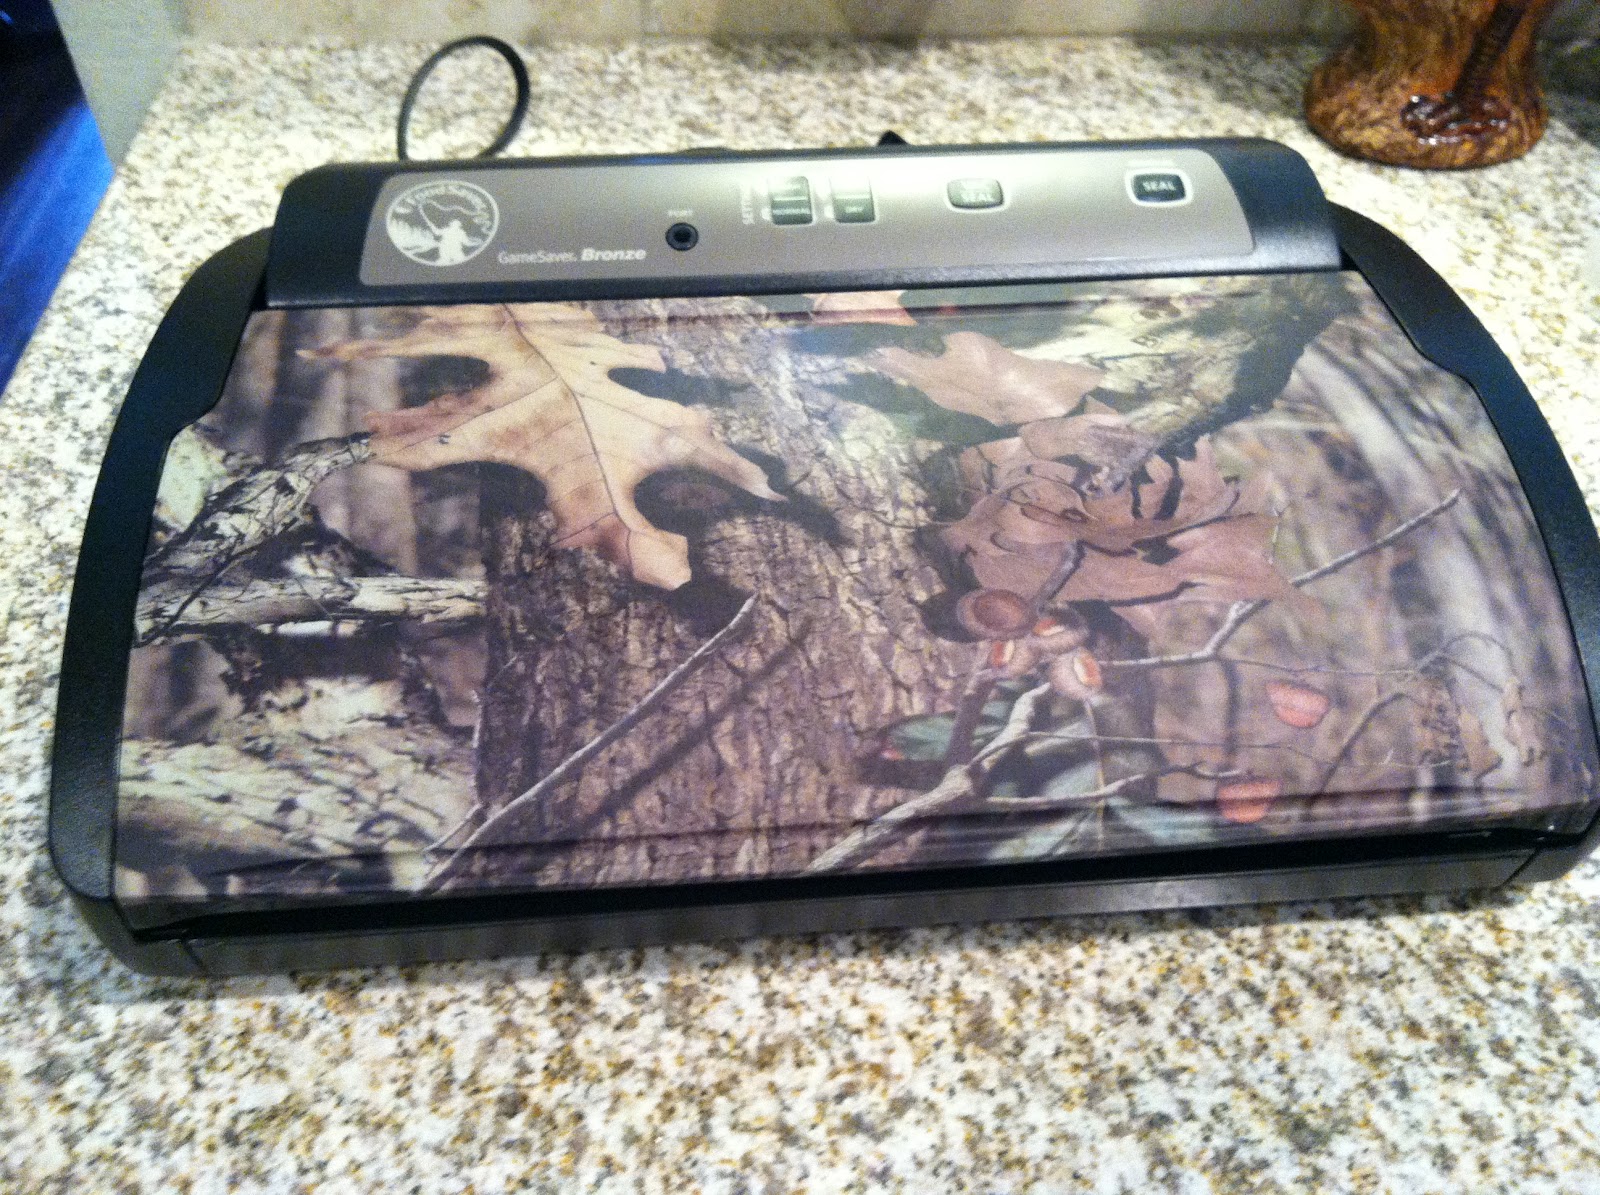
For the packages of ground beef, I use a quart size Food Saver bag. I turn down a "cuff" on each bag before filling to keep the top sealing edge clean. I measure out about a pound using a scale into each bag. Even though my new Food Saver has a "moist" food setting, they recommend you pre-freeze the meat just till any liquid is frozen. So I place the open bags in the freezer, with the clean sealing edge up. I set the timer to go back in an hour and pull them out for sealing.

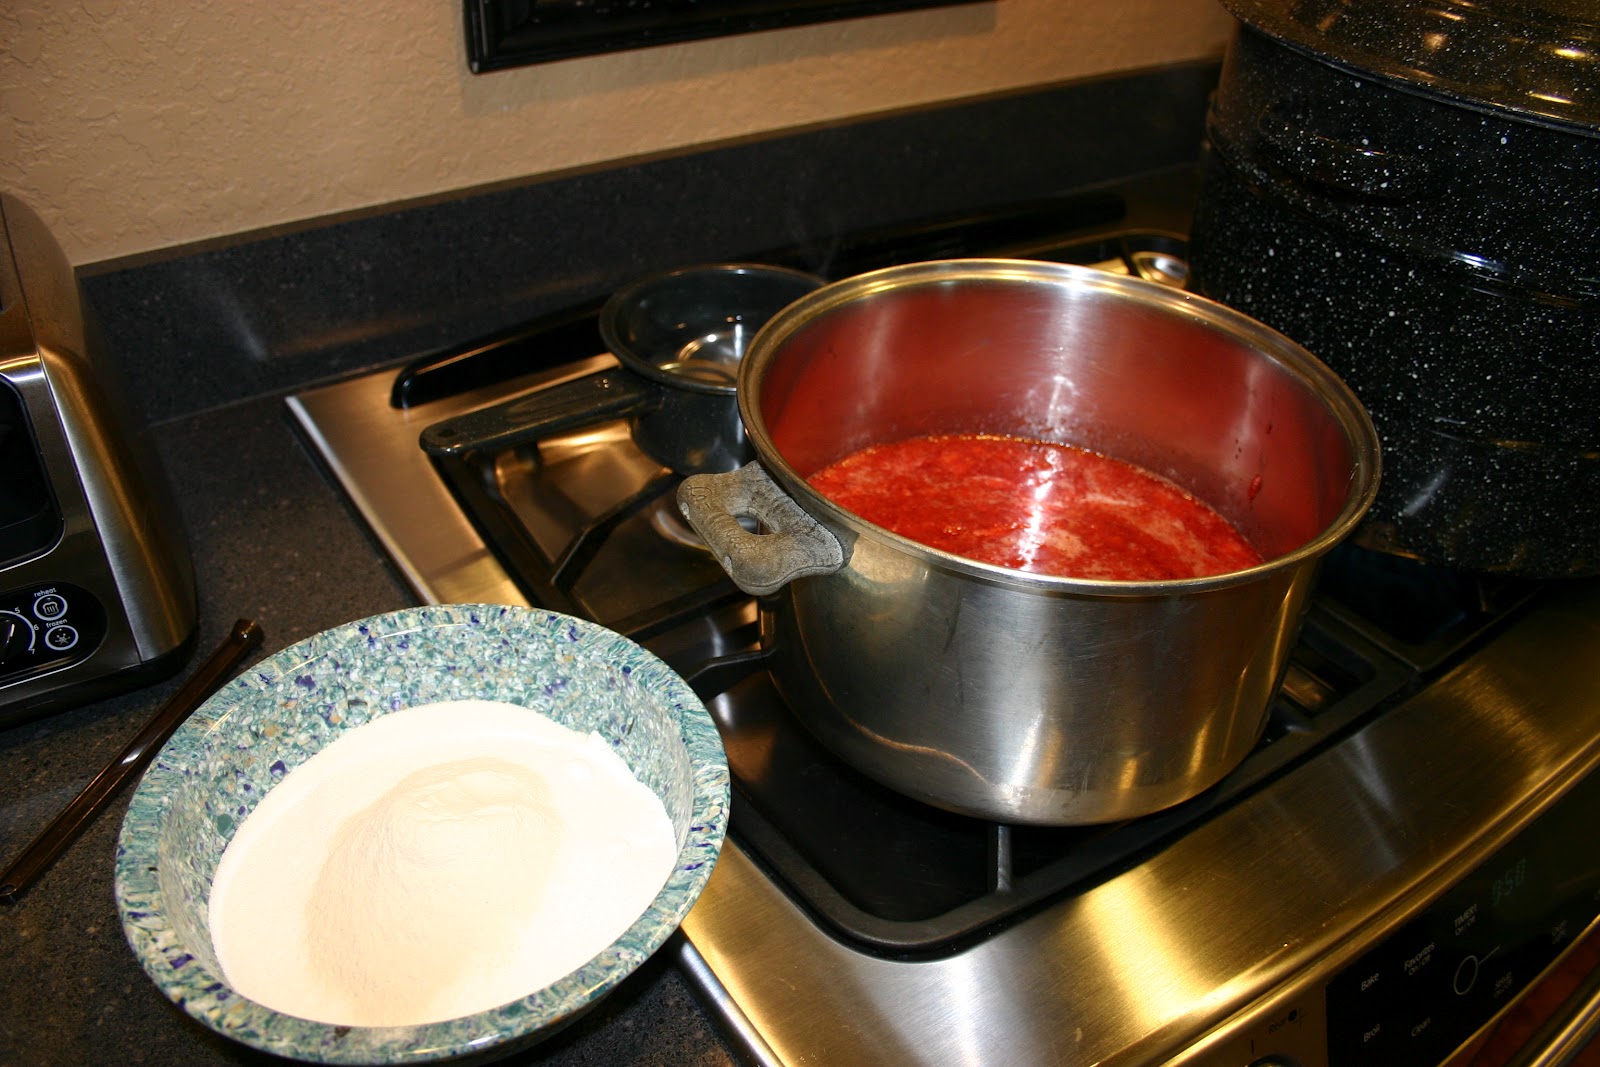
To make the meatballs, after I've made burgers, and taken out what I want to be frozen in one pound packages, I weigh what's left. I had aprx. 2 pounds or thereabouts today. Using the same bowl, I ran sliced frozen onions* through the grinder, right into the ground meat. Then I added a slice of bread (the heel) to the grinder to get all the last bits of meat and onions out. I made "basic" (not Italian flavored) meatballs today cause I want to make Swedish Meatballs for dinner and it was easier just to make one recipe. I didn't add any egg just in case Journey eats with us when we have them. I used to use my Pampered Chef cookie dough/mellon baller thingy to shape the balls, but find that it takes too long. I found an easier way when you're making a lot: flatten the meat mixture out to about 1 inch or so high on the cutting board. Square up all the edges till you have a square or rectangle shape. Using a large knife, cut rows in the meat about 1" or so in width, then go back and cut those slices into squares about 1" each. Then you end up with 1" meatballs. Pick them up and round them in your hands and place on a lightly greased pan. I use a stoneware (Pampered Chef) pan that's big enough to hold them all. Place in the oven about 350 deg. and bake till done, turning occasionally. After they're cooked, I cool and individually freeze them the same as I did for the burgers. Then dinner time can be as simple as opening a jar of spaghetti sauce, dropping about 6 meatballs in (still frozen!) and cook till hot. It doesn't get any easier, unless you have someone come to the house and cook it for you.

I have also made the meatballs and froze them uncooked, which is also easy but by pre-cooking them, your dinner is ready to "heat and eat".

You may notice my laptop in the picture. I set my laptop on the counter and play You Tube videos on various subjects that interest me while I work. Today I was watching videos on how to heat seal mylar bags using a Food Saver. I just got a Food Saver so I'll so a post on how I'm using it later.

* You may remember a previous post about the onion harvest. Someone (Kathy?) asked what we would do with so many onions. Well, we sold some, but most of them went into the freezer. When you cook 99% of your food from scratch you need lots of onions. We use lots of them in salsa, relishes, etc., but literally use then daily in cooking. We used a lot fresh, but when the humidity started to get to them, Marc sliced and diced the rest of the onions and put them in canning jars in the freezer. All we have to do is take out however many we need for a particular recipe and throw them in the pan. It's home made convenience cooking.

Thursday, June 9, 2011

Muscadine Daiquiri's


I have quite a bit of grape juice in the freezer from last year and the grapes are getting ripe already again. We decide to try making a cocktail like a berry margarita, only with muscadine grape juice and rum, not tequila. Ok, so it was not really like a berry margarita, but it was still good. Muscarita??

Sunday, August 8, 2010

Grape Stompin'


After working at a winery for almost 10 years, Marc's not too keen on picking or pressing any more grapes. He has a few wine grape plants scattered around and they're ready to pick. He initially planted 60 when we first bought the property, but wild hogs rooted most of them up before we moved out here. We have a bumper crop of wild Muscadine grapes this year too. They're not planted in civilized rows with manicured aisles between, they grow on trees, fence lines, etc. You have to watch for spiders, wasps, snakes etc., when picking them, and I don't like wild critters at all.
I remember when I was a teenager, Dana made some homemade wine. All I remember is that she put it in a crock in the pantry and must have used a lot of sugar, cause it was sweet. (I dipped a few sips out of the crock).

I would like to try making some home made wine, but don't really have all the equipment yet, so I guess I'll have to wait till next summer. Meanwhile, I'm juicing grapes for jelly, syrup and maybe even just to drink.

I pulled out my trusty Roma Food Mill and inserted the grape spiral and started cranking. It was incredibly easy (Sidebar: I am not getting paid by Lehman's to advertise, but I have to say, this is well worth the price. You can get the basic food mill and all extras for about $75. It saves unbelieveable amounts of time and work) The skins and seeds went out one side and the juice and pulp the other. I ran the skins through again just to be sure I got all the juice. So far I have 1-1/2 gallons of juice in the freezer.

Monday, June 7, 2010

Salsa!

Last year our tomato crop was sad (due to various operator errors...) and we had about enough tomatoes for a couple batches of salsa. We rationed it for as long as we could. It was a sad day when we ran out.

This year I stood in the garden after pulling a turnip and vowed, as God is my witness, I WILL have salsa this year!

Seriously though, my goal is to grow and preserve EVERY tomato product we will use for the next 12 months. Tall order? Yeah, maybe. I've never made tomato paste - not sure if it's even feasible at home. So maybe I won't try that one. But I refuse to pay $1.00+ for even one can of tomatoes this year.
Marc is even on board with making home made ketchup. He's never tried home made ketchup before. He likes all things pre-prepared - Heat & Eat. He probably won't like home made ketchup. I made it once years ago and while good, it's not as smooth as store bought.

I made the first batch of Salsa last night. It took about 3 hours from start to finish, which is pretty good. The OLD method involved scalding tomatoes, peeling and coring them while still hot (ouch), then chopping in the food processor. What a mess!!

I have a gizmo called a Roma Food Strainer & Sauce Maker. I bought this from Lehman's online. (I had one many years ago that I got with S&H Green Stamps!! I guess I sold it in a yard sale somewhere along the way). Anyway, it looks somewhat like a meat chopper. It has a big bowl that holds the food, a handle that you crank and an auger kinda like a meat chopper. But instead of knife blades, it has cone shaped "screens" that the food travels through. Here's the cool part: the good stuff (pulp) comes out one end and the stuff you don't want (peel, seeds) goes out another. No peeling tomatoes!!! It's super easy to use, you just cut up the tomatoes and throw them in. No cooking or peeling!


Roma Food Mill

The Roma can be purchased with various screens - at an additional charge of course. It comes with the basic puree screen. I've used this to make tomato sauce and "apple" sauce (from pears). The additional screens are: grape, berry (it takes those pesky little seeds out of dewberries!!), pumpkin and Salsa. Pumpkin works for other large seeded things like butternut squash.


Close up view of the soon-to-be-Salsa

The Salsa recipe I used came from Mary who got it from Haven Wisnoski. It's really good. Here's Haven's recipe:

  • 1 1/2 Gallons chopped tomatoes (liquid drained)
  • 3 large chopped onions
  • 8 bell peppers/poblanos chopped
  • 1 quart jalapenos chopped (I don't seed all of them)
  • 5 cloves garlic chopped
  • fresh cilantro
  • 1 tbsp. garlic powder
  • 4 tbsp. salt
  • 1 tbsp. pepper
  • 1 tbsp. crushed red pepper
  • 2 tbsp. sugar
  • 1 tbsp. veg. oil
  • 1/2 cup vinegar
  • 1 tbsp. cumin
  • 1 tsp. paprika
  • 1 tsp. chili powder
Put all ingredients in a large pot- bring to a rolling boil- turn down heat and simmer for 20 minutes. Put in sterile jars and seal makes approx. 17 pints

That's a lot-a Salsa!

I increased the vinegar to 1-1/2 cupes and processed the jars in a water-bath canner for 15 minutes. All of the veggies were grown in our garden.

The finished Salsa

Wednesday, February 24, 2010

** Snow Day ** and Oatmeal Cookies

After the warm weekend we had, we thought spring was on its way. Wrong! It snowed yesterday! I left work early just in case the roads got icy. Coming out of Houston it rained most of the way then magically the rain turned to snow about 2 miles south of the house. Then it snowed all afternoon until dark. It was beautiful!


Unfortunately when we woke up the snow was gone..... But at least today it's sunny. I wish it snowed here in winter instead of the dreary rain! It was so nice watching the snow fall (from inside).
I decided oatmeal cookies would be a nice snack to enjoy while watching the snow fall. I'll share my recipe.
My favorite oatmeal cookie receipe comes from a little booklet that I bought at a yard sale for 25 cents. The original price was 20 cents. There's no date on the booklet anywhere but it looks like it was from the 50's or 60's. It's called Pillsbury's Best Butter Cookie Cookbook (Volume III). I've made several of the recipes which are all very good. The Peanut Blossoms recipe is great too. It's funny reading these old recipes because most of the women used their husband's name, for instance the lady who created the Peanut Blossom recipe is a Mrs. Chester Smith. Can you imagine??
This receipe is called Oatmeal Chip Cookies. Of course I always change a recipe somewhat so here's the way I do it:
Preheat oven to 375 degrees.
In mixing bowl, cream together:
  • 1 cup butter
  • 2 cups sugar
  • Aprx. 1-1/2 tablespoons of molasses (I think this is what makes these cookies moist on the inside. The recipe calls for 1 c. white sugar and 1 c. brown, but I always use molasses.)
Then add 2 eggs and beat well
Stir together in a separate bowl:
  • 2 cups flour
  • 1 teaspoon baking soda
  • 1 teaspoon salt
Then add to creamed mixture, mix well.
Stir in:
2 cups quick cooking rolled oats.
1 cup raisins OR chocolate chips
The recipe calls for 1 cup of nuts also, which I sometimes add and sometimes don't, just depends on whether I have them or not.
You can chill the dough if you prefer, for easier handling. Shape dough into balls, using a rounded spoonful for each. Place on ungreased baking sheets. Bake 9-12 minutes until golden brown. Allow to cool slightly then remove to wire racks.
I like small cookies and I like them to be uniform, not only because they look better, but they also cook more uniformly, so I use a gadget from Pampered Chef that looks like a melon baller or ice cream scoop, but basically it measures out a perfect portion in a nice round ball. It makes easy and fast work of making cookies. They come in three different sizes. I have a large one and sometimes make cookies with the larger one also. You can see it in the picture below.
I also use an air-filled cookie sheet for even baking and parchment paper for easy clean up.
Yum-O
The wire cooling racks in this picture were Mom's. I can only imagine how many cookies and cakes she cooled on them over the years!! They're probably pretty old and still going strong. I also have 2 racks from Marc's Mom. They're a little different but also old and well made.
The other cookbook in the picture is the Betty Crocker Cooky Book. This cook book was Mom's also. The page that showed the copyright is long since gone. There's still a sticker on the front that says $2.95 so you know it's old! I think it came out in the 60's. A few years back they reprinted it exactly as it was then so I gave all my daughters a copy, along with a note about which recipes were favorites. (Note: Stephanie had it for years with the cellophane wrapper still on... only recently, after moving into their house in Navasota did she crack it open)
I remember as a kid making recipes out of that book (making recipes with friends with spent the night, and leaving the mess for Mom to find in the morning). Pages 22-23 are stained from use. On those pages you find Snickerdoodles (I won a ribbon in the county fair many years ago with that recipe) and Chocolate Crinkles, as well as Peanut Butter Fingers, all of which I've made countless times.
I like cookbooks and have collected many over the years. I finally had to purge my stash, I simply didn't have room for all of them. I like any cookbook from the 50's because it seems like life was so wholesome and simple back then (our grand kids will probably say that about 1999).
I have a cookbook that Kathy gave me in 1977 - The Joy of Cooking. It is tattered and stained and sections have come loose from the spine but I still use it all the time. I learned to cook with that one. Everything you could need is in there - from how to set a table to how to stock your pantry to how to cook any food you could imagine. I am sure that I've literally read every recipe in that book.

Sunday, February 21, 2010

Roasted Butternut Squash Risotto

A few years ago when Martha Stewart was released from prison, a reporter asked her what she was having for dinner. She replied "Risotto!" I had never had risotto before although I'd heard of it. I figured that if Martha Stewart was having risotto for dinner on the first night she was released from prison, it must be something special. So I decided to make it. I couldn't believe my taste buds. I made the simple, classic recipe on the package of arborio rice. It was delicious.

Since then I've experimented with other combinations. Since I had an overabundance of butternut squash this fall I've made Roasted Butternut Squash Risotto several times. Since the first time I've made it I realized that it's one of those dishes that you can make substitutions and cut corners and it still turns out great. So, here's how I did it.

First, I cooked the butternut squash. Most recipes tell you to peel it first, but that is a LOT of work and I am looking for the Easy Button whenever possible.


I cut the squash in half, remove seeds, place cut side down on a stoneware pan with a little olive oil and bake till done. Then I scoop out the innards and discard the peel. This is a good way to do it when you have a lot of squash and need to get them processed quickly, which is what I had to do. I then packaged it in recipe-sized portions and froze it. Of course this only works when you will be mashing the squash. Ok, back to risotto...

In a heavy saucepan, saute 1 medium onion in a combination of olive oil and butter (about 3 Tbls. total) till tender & transparent, but not brown. Meanwhile, in another pan heat about 6 cups of chicken stock and keep it hot. Add 1-1/2 cups arborio rice to the pan with the oil and onions and saute for a few minutes.


Here you can add a little wine if you want to. Otherwise, begin adding the chicken stock, one half cup at a time. Cook at a strong simmer till the stock is absorbed, then add the next one half cup. Keep doing this till the rice is tender (or al dente if that's how you like it), which will take about 20 or 30 minutes. You're supposed to stir constantly, but hey, I don't. The rice will be creamy when done. Add the mashed squash, salt to taste, and add 1/2 cup or so of parmesan cheese, grated.

The thing that's neat about this is so long as you don't burn it you really can't screw it up. Also good - mushrooms and spinach instead of the squash.

Tuesday, January 26, 2010

My Favorite Small Kitchen Appliance

I'm always finding new ways to use my Kitchen Aid Mixer - it's my favorite, most useful small kitchen appliance (thanks Caroline!). I have a food grinder attachment and buy roasts on sale and grind them into hamburger for a fraction of the cost of lean ground beef. Now even Marc has learned to do this! We've made sausage too as you can see from a previous post and bread. I made pizza dough two nights ago, using our home made Italian sausage and it was delicious! If you want the dough recipe let me know.

So, I have this attachment that I think they call the Roto Slicer Shredder or something weird like that. It comes with four "drums" about 4 inches across on the front. I inherited it from Mom. I'm not sure what exactly she did with it - I think I recall her shredding cabbage to make coleslaw. It's stainless and aluminum but the new ones are made of plastic.

It's my new favorite toy in the kitchen. I used to have it squirreled away in the closet under the stairs and had to move 25 things to get it out so I rarely used it. I wasn't sure what I'd do with it anyway.

But now, in my quest to save money I found a fabulous use for it - grating cheese in bulk. I quit using pre-grated cheese a while back, not because of the cost, which is staggering if you do the math, but because they add something to keep the cheese from sticking together, and I can taste and feel it when I eat it. I used a hand grater which gets old fast. So now I buy cheese in bulk and if you pay attention you will find that it's on sale quite often. I just got several types for $2.99 per pound recently. I grate a whole block (1-2 pounds at a time) with the Roto Slicer Shredder thingy and it takes about 5 seconds! I store the cheese in a Pyrex refrigerator dish.

I remember Dad making potato chips when I was a kid and he used this gizmo. He was always making some really weird dish like potato chips or donuts. He never made run of the mill meals. So last night I wanted sweet potato oven fries but I got a wild idea that we'd have sweet potato chips! The potato I used was huge, so I had to cut it in half and I used the thin slicer drum and even though sweet potatoes are hard to slice it worked great! Most of the slices were paper thin, a few were a little thicker. I fried them in 350 degree oil in a cast iron pot until they were golden then drained them and sprinkled coarse (kosher) salt on them. We snacked on them while dinner was cooking - they were great with a beer... Even Marc, who does not like sweet potatoes, liked them.

So I wondered if the chips would be good today and they're still crisp so I will be having some with lunch.

Tuesday, January 12, 2010

Sausage Making

We FINALLY had the pig "processed". Josh came with a trailer to load him one freezing morning. We lost track of how long we had him. Savanah got him to show in a fair, but he developed a limp early on which made him unacceptable as a show prospect so that's how we got him. We think we had him about 7 or so months. He got a large amount of cracked corn each day but he preferred table scraps. His favorite food of all was home-grown ripe cantaloupe.

Josh estimated his weight to be around 350. His hanging weight was 250 pounds. I could write an entire post about raising animals for slaughter, processing, humane treatment, etc., but I'll save that for another time.

We're not sure exactly how much meat we ended up with, but it was a lot! We didn't have room in the chest freezer for all of it - some had to go in the fridge freezer and some (the head and the fat) in the fridge in the shed. We gave the head to some people who make tamales. We're going to render the lard (more on that exciting project in another post....)
Since we weren't sure how much sausage we wanted to have, we just had the trimmings ground and put all the roasts in the freezer. In the future we can always grind up some roasts if necessary to make more sausage. We had 25 pounds of trimmings, which is a good bit to work with when you're making the sausage yourself. It was really nice having the meat ground by the butcher. What a timesaver! All we had to do was season, stuff if desired, and smoke (which comes a little later).
I researched home sausage making on the internet and found recipes using 45 and 90 pounds of meat!! I finally found recipes that used 5 or 10 pounds, which is just about right for us. The recipes can be found at www.dakotahsausagestuffer.com/makesausage.htm


The first batch of sausage we made was breakfast sausage. This was very easy. It's basically ground pork, salt and spices. A note on the spice jars shown in the picture - I wanted a spice rack and looked all over the internet but couldn't find one I liked for less than $50. I happened upon one at a yard sale for $2. It included a wooden rack and about 20 or so jars. I cleaned it up, wiped a little stain on the rack to shine it up, and made labels on my ink jet printer. What a good deal!

Ok, so back to the sausage. We made some links and some bulk. The links are somewhat difficult and practice makes perfect. After making all the links I realized you can make one long tube THEN twist the individual links. You want to try to get the links all a uniform size and it's pretty tricky trying to make sure the meat is pushed down into the grinder, you support the casings as the meat is filling it and so on. Of course just about the time you start to get the hang of it you're done. Marc had to handle feeding the grinder while I was in charge of the casings. After a while we got tired of doing that so we finished with bulk sausage. I got supplies from Eldon's Jerky and Sausage Supply. I bought casings and poly storage bags which I used for the breakfast sausage. We packaged the sausage in Foodsaver bags and vacuum sealed them.

For the breakfast sauage, I carefully measured the salt and spices according to the recipe and made a small tester patty, which tasted really good. However, the finished sausage tastes a little salty. Again in hindsight I realize I didn't follow the directions exactly - you're supposed to mix all the salt and spices in the water before you add to the meat. I initially sprinkled the first tablespoon of salt over the meat before I remembered! For 10 pounds of ground trimmings, I added 2 Tbsp. table salt, 1-1/2 Tbsp. sage, 1-1/2 tsp. thyme, 1/2 tsp. ginger, 3/4 tsp. nutmeg, 1/2 tsp. pepper, 1/4 tsp. cayenne pepper and 1/2 cup water. Caroline and Stephanie said it needed more sage.


Since the meat was already ground all I had to do was stuff the casings using the food grinder attachment to my Kitchen Aid mixer. I use it quite often to grind roasts I find on sale into hamburger. I bought the sausage stuffer attachment set (the tube thing that comes out the front) on Ebay for about $8 including postage. The grey plastic bin in the photo is a food grade storage tote that I got from the restaurant supply store. It really came in handy for mixing the 10 pounds of pork that we used for the breakfast sausage recipe.
After making the breakfast sausage we made a batch of Beer Brats. I substituted beer for the water in the Bratwurst recipe. Don't they look good?! Marc likes to grill brats but I've never really liked them. I'm hoping that homemade sausages will taste better than store-bought.


Next, we made bulk Italian Sausage. I used our home raised dried cayenne peppers in this to add a little kick. We packaged this in 1 pound packages. I plan to use this for lasagna, spaghetti, pizza, etc. The ground pork is fairly lean - it has less fat than ground chuck.

Next weekend we plan to make Polska Kilebasa, which will be smoked.

We have 12 pounds of bacon curing right now. This weekend when it's done we'll smoke it and I'll post some pics of that process!