Showing posts with label Preparedness. Show all posts

Monday, October 1, 2012

Save with the Food Saver

If you've read some of my posts about grinding your own hamburger or other food preservation posts, you know that I buy foods in bulk when on sale.  Well, you've got to do something with all that food.  Freezing is by far the easiest method of storing it on the front end.  Previously I bought so-called "freezer bags" (i.e., Zip-Loc) but found them to be lacking for long term storage.  I had wanted to buy a Food Saver for quite some time but put it off because they're really expensive and I wanted to be sure I got one that had all the features I wanted and for the right price.

After researching various models and brands on the web, I found that the better models have a moist/dry setting which helps when you are packaging wet foods, such as blanched squash or meats.  I also watched some YouTube videos showing how to use it and learned some tips and tricks.

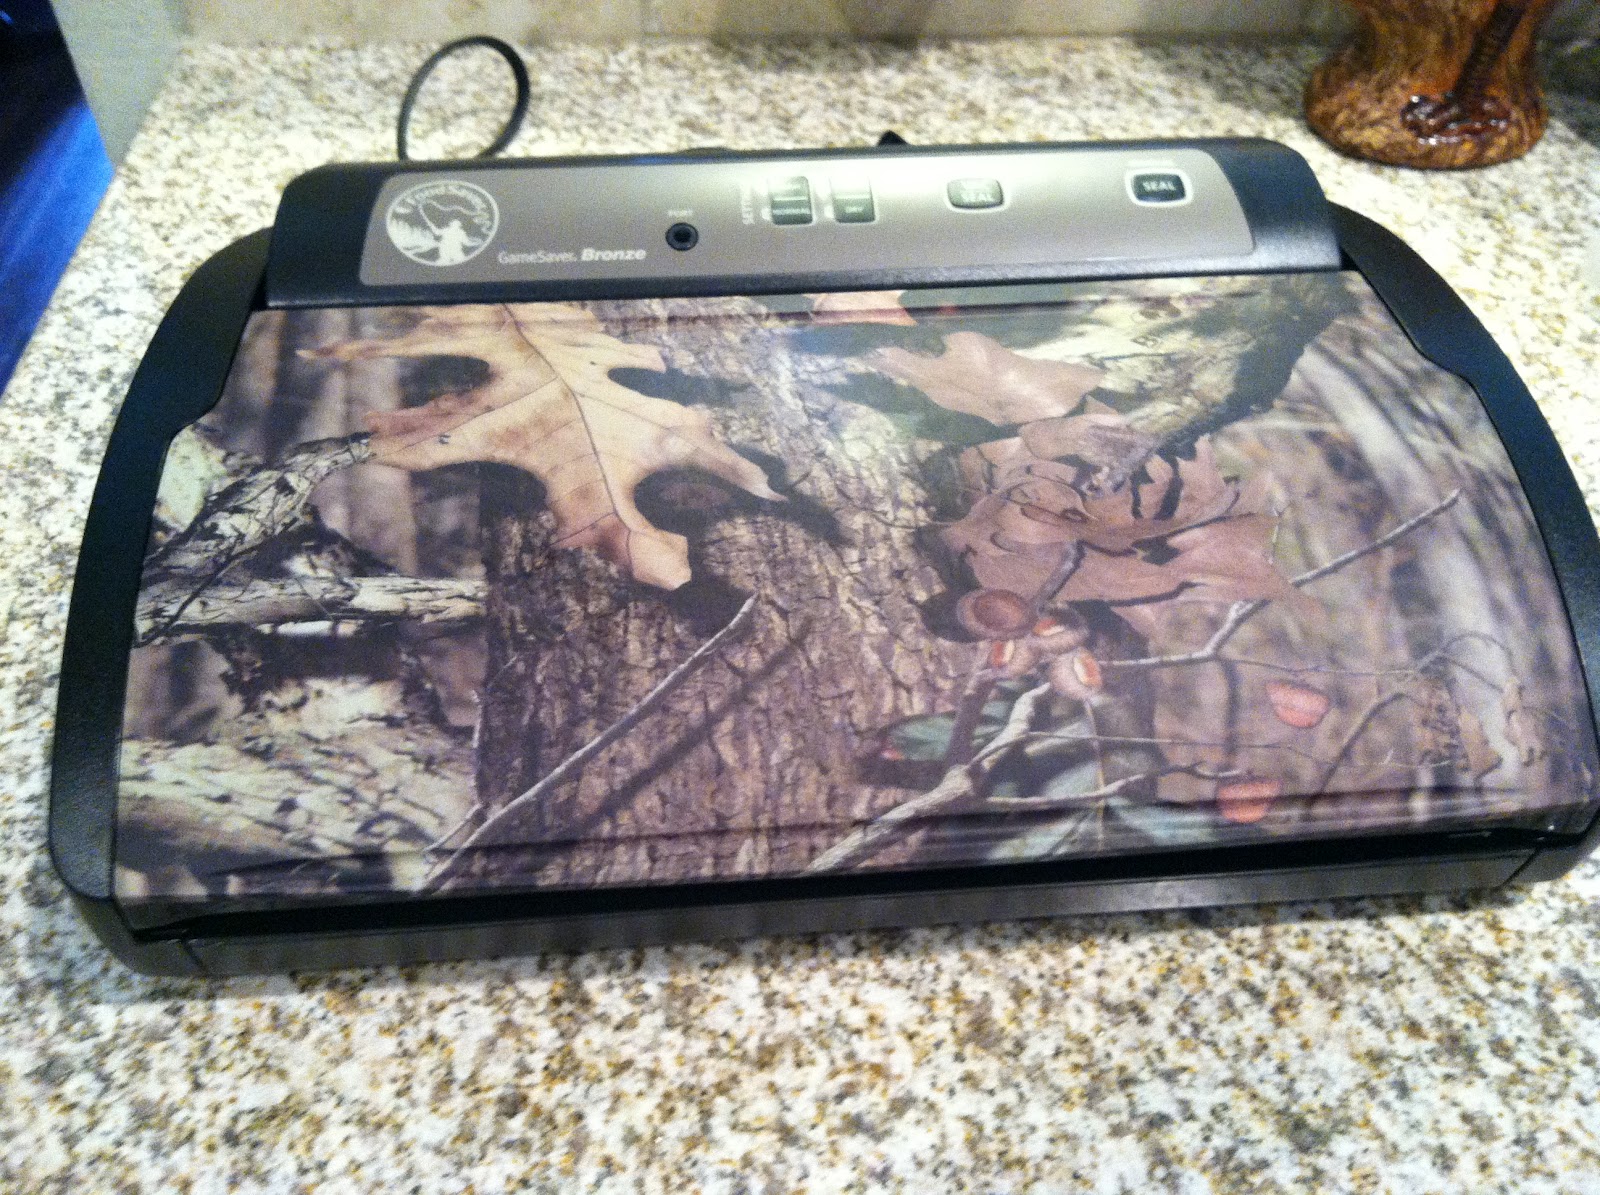
I bought the "Gamesaver Bronze" model.  It was about $169.00.  It has a "camo" design on it which I don't care for, but since I keep it in a cabinet I guess it doesn't matter. It has a fast and regular setting, a moist/dry setting, a separate vacuum/seal setting and a seal only setting. It also has a removeable drip tray, a built in cutter, storage compartment, and a vacuum tube for use with accessories.

I also ordered a jar sealer (sold separately of course) which fits on the top of a mason jar. They have two - one for regular mouth and one for wide mouth mason jars.  The regular is $8.99 and the wide is $9.99.  You attach the tube to the FS, place the jar sealer on a jar on which you've placed a canning jar lid (no ring) and it sucks out all the air.  You don't "can" wet foods in the traditional sense with this method, but it works to extend the freshness of dry foods like nuts, seeds, beans, etc.  You can also vacuum seal refrigerated foods to help preserve them a longer.  Again, it doesn't "can" foods.  But it works so well you have to use a can opener to get it open.  You could also use it to prepare jarred foods for freezing.  Once you sign up on their website you get occasional emails with free shipping, or discounts on bags.  I bought the jar sealer and got free shipping.

The FS website claims that foods keep up to 5x longer. I was skeptical at first, but my research shows that is true. I found this information to be corroborated in the Ball Blue Book and several state college extension websites.

Before buying the FS I was limited to using Zip Loc freezer bags or freezer paper. I can't find freezer paper at the local Wal Mart. I found some recently at a quilt store if you can believe it and paid $4 something for it. If you are only buying and freezing small quantities of foods you probably won't have an issue with freezer burn, but if you buy meat in bulk or raise your own vegetables you will find that Zip Loc bags aren't the answer.  They do let in vapor.  Before buying the FS, twice in one month we pulled some steaks out of the freezer that had been stored in Zip Loc bags which were freezer burned. A couple of episodes like this and the Food Saver will pay for itself.

The very first thing I sealed with the FS was pecans. I always check the mark down section at Kroger when I shop and I found chopped pecans for $1.25 per 6 oz. bag. The regular price was $4.65! The expiration date was many months out. I packaged them in FS bags, three to five bags per FS bag. I pierced the original bag first to make sure all the air came out. I labeled the bags with the expiration date. If I haven't used them by that date I can drop the bags in the freezer for long term storage to be on the safe side.  I bought 20 of the bags and realized I should have bought all of them. I really like pecans, but they're so expensive! This way I have them ready to use. I saved $3.40 per bag, which totals $68 in savings for the 20 bags.  You can see how the Food Saver will pay for itself over time. 

I also learned that I can seal Mylar bags or reseal chip bags (which are usually mylar). I have sealed up wheat and beans in Mylar bags for long term storage, since I have a pretty good supply of wheat in short term storage.  It doesn't vacuum the Mylar (I think because it's too thick), only seals it so you still have to use oxygen absorbers.  To be on the safe side, I add a second seal about 1/2" from the first seal. Mylar bags can be purchased on the internet, but I get them at the Mormon cannery for pennies, so much cheaper than anywhere else. 

To freeze meats or moist vegetables for long term freezer storage it works best if you pre-freeze the foods.  You load up the bags and set them in the freezer till partially or completely frozen.  This way any liquids don't get sucked up  into the sealer.  This is what causes most seal failures.

In the pic below you can see two chicken breasts that I've prefrozen.  I am sealing them in this pic.  Also you can see the bag storage area and cutter. 

The bags can be somewhat expensive, however, they do keep foods 5x longer than a zip loc or freezer paper wrap.  They can be purchased in pint, quart, gallon, "portion-size", or on one long continuous roll which you cut to make your own custom sizes.  This is what I use. Also, they can be reused.  I only reuse the ones that do not contain meats.  I hand wash, air-dry and put them away for future use.  You can boil the foods directly in the bags as well.  They now make a bag that you can microwave in, which would be convenient for corn on the cob or other veggies.

Monday, February 27, 2012

Make Your Own Ground Beef


Why you ask? Here's why I do it:

1. You'll know what's really in it. If you haven't heard about "pink slime" or "mechanically separated" meat, I challenge you to google it and learn, if you dare. I ground about 7-1/2 pounds of chuck roast today and my ground beef is 100% ground chuck and nothing else.

2. It's WAY cheaper. I watch the sales and then stock up. If you start to pay attention to grocery store cycles, they have sales on certain items periodically. The trick to saving money is to buy enough when it's on sale to last you till the next sale. So this week Kroger has boneless chuck roast for $1.99 per pound. This is when I buy a bunch and grind it up. If they have a limit, then I go more than once in a week. Right next to the roasts they have Ground Chuck for $1.99 per pound. You might look at that and think, why would I want to go to all of the trouble of grinding my own when it's already ground up for the same price. However, if you look closely the Ground Chuck is 73% lean. This means that it's TWENTY SEVEN PERCENT FAT. They literally add fat to it. They jack up the price of the "lean" ground chuck and add that fat to the cheaper ground chuck. Anyway, what I'm trying to say is that isn't a bargain when you are going to throw away (by draining off the fat) 27% of what you're paying for.

3. It's easier than you think. You don't need a commercial meat grinder. I use a grinder attachment on my Kitchen Aid Mixer. You can sometimes buy these on sale for $55. It's WELL worth it. I use it all the time.

4. It's fresh. I read that Wal Mart uses some type of gas to keep its meat looking pink and fresh. Just because it LOOKS fresh doesn't mean it really is. I know that everything I used was clean and the meat went into the freezer right away.

Here's how I do it. I use a Kitchen Aid Mixer with the grinder attachment. I try to get all my cuts to about 3/4" in size. This way, they move through the grinder quickly. I cut roasts into 3/4 slices, then the slices into 3/4 strips, then 3/4 dices, or thereabouts. I do trim off all gristle and sinew and any big chunks of fat. I don't worry much about little bits of fat marbled into the meat. The whole process goes faster if the meat is very cold. Here's a tip: use a piece of foil to "drape" over the opening of the grinder to deflect any liquid that spurts out to help keep it off the floor and you. Marc came up with this idea.

The grinder attachment comes with a couple of different plates (the holes are different sizes). I use the small one for ground beef and a mid-size one for chili beef.

If we're going to want burgers to cook on the grill, I will add some fat back to the ground meat so that the burgers won't fall apart on the grill. The fat cooks out for the most part. However, if I'll be making basic ground beef or meatballs to cook in the house, I try to eliminate as much of the fat as possible.

Today I ground about 7-1/2 pounds of ground chuck. Out of this I made 6 burgers, 3 pkgs of ground beef and about 47 meatballs.

To make burgers, I use a 1/2 cup measuring cup to measure the ground beef for each portion. This is a great size for grilling, but if you will be using the patties smothered with onions and mushrooms on the stove top you might want smaller portions, say 1/3 cup each. I line a cookie sheet with parchment or freezer paper and measure out 6-1/2 cup portions of ground beef, then flatten them out. I then place the cookie sheet in the freezer (unwrapped) to "quick freeze" the patties. In about two hours or so (or whenever I remember them) I go back and pull out the cookie sheet and if the meat is frozen, I peel the burgers off the paper and put them in a plastic freezer bag and label. What's great about this method is that the burgers won't stick together cause they are individually frozen. I just pull out the number of burgers I need for a quick meal. I don't even have to think about defrosting anything.

For the packages of ground beef, I use a quart size Food Saver bag. I turn down a "cuff" on each bag before filling to keep the top sealing edge clean. I measure out about a pound using a scale into each bag. Even though my new Food Saver has a "moist" food setting, they recommend you pre-freeze the meat just till any liquid is frozen. So I place the open bags in the freezer, with the clean sealing edge up. I set the timer to go back in an hour and pull them out for sealing.

To make the meatballs, after I've made burgers, and taken out what I want to be frozen in one pound packages, I weigh what's left. I had aprx. 2 pounds or thereabouts today. Using the same bowl, I ran sliced frozen onions* through the grinder, right into the ground meat. Then I added a slice of bread (the heel) to the grinder to get all the last bits of meat and onions out. I made "basic" (not Italian flavored) meatballs today cause I want to make Swedish Meatballs for dinner and it was easier just to make one recipe. I didn't add any egg just in case Journey eats with us when we have them. I used to use my Pampered Chef cookie dough/mellon baller thingy to shape the balls, but find that it takes too long. I found an easier way when you're making a lot: flatten the meat mixture out to about 1 inch or so high on the cutting board. Square up all the edges till you have a square or rectangle shape. Using a large knife, cut rows in the meat about 1" or so in width, then go back and cut those slices into squares about 1" each. Then you end up with 1" meatballs. Pick them up and round them in your hands and place on a lightly greased pan. I use a stoneware (Pampered Chef) pan that's big enough to hold them all. Place in the oven about 350 deg. and bake till done, turning occasionally. After they're cooked, I cool and individually freeze them the same as I did for the burgers. Then dinner time can be as simple as opening a jar of spaghetti sauce, dropping about 6 meatballs in (still frozen!) and cook till hot. It doesn't get any easier, unless you have someone come to the house and cook it for you.

I have also made the meatballs and froze them uncooked, which is also easy but by pre-cooking them, your dinner is ready to "heat and eat".

You may notice my laptop in the picture. I set my laptop on the counter and play You Tube videos on various subjects that interest me while I work. Today I was watching videos on how to heat seal mylar bags using a Food Saver. I just got a Food Saver so I'll so a post on how I'm using it later.

* You may remember a previous post about the onion harvest. Someone (Kathy?) asked what we would do with so many onions. Well, we sold some, but most of them went into the freezer. When you cook 99% of your food from scratch you need lots of onions. We use lots of them in salsa, relishes, etc., but literally use then daily in cooking. We used a lot fresh, but when the humidity started to get to them, Marc sliced and diced the rest of the onions and put them in canning jars in the freezer. All we have to do is take out however many we need for a particular recipe and throw them in the pan. It's home made convenience cooking.

Wednesday, January 25, 2012

Are you prepared for a Zombie Apocalypse?

If you're ready for a zombie apocalypse, then you're ready for any emergency. emergency.cdc.gov

According to the Center for Disease Control (CDC), if you're prepared for a Zombie Apocalypse, you're prepared for any emergency.

This morning we awakened to a tornado warning and watch. The skies were green, the wind was howling, rain pounding down, etc. I immediated went under the stairs... and I realized that we were NOT prepared. We need a "Bug Out Bag" (or Disaster Kit).

This Kit is to contain items you need to survive during the period between a distaster/emergency and the time help arrives, usually 72 hours or more. I recall my Mother talking about being prepared in the early 60's for a Russian nuclear attack by having boxes of emergency supplies in the car. Being a military wife, she knew what to have on hand. Since that time we've gotten lazy. We expect that FEMA, friends, family or SOMEONE will come to our aid. Hurricane Katrina should have made us all realize that isn't going to happen.

According to the CDC's website, here's what we should do to prepare for a natural disaster or emergency situation:

Gather Emergency Supplies
If disaster strikes your community, you might not have access to food, water, or electricity for some time. By taking time now to prepare emergency water supplies, food supplies and disaster supplies kit, you can provide for your entire family.

Even though it is unlikely that an emergency would cut off your food supplies for two weeks, consider maintaining a supply that will last that long.

You may not need to go out and buy foods to prepare an emergency food supply. You can use the canned goods, dry mixes, and other staples on your cupboard shelves.

Having an ample supply of clean water is a top priority in an emergency. A normally active person needs to drink at least 2 quarts (a half gallon) of water each day. You will also need water for food preparation and hygiene. Store at least an additional half-gallon per person, per day for this.

Store at least a 3-day supply and consider storing a two-week supply of water for each member of your family. If you are unable to store this much, store as much as you can. You can reduce the amount of water your body needs by reducing activity and staying cool.

And don't forget to take your pets and service animals into account!

Disaster Supplies Kit

A disaster supplies kit is a collection of basic items that could be needed in the event of a disaster. Assemble the following items to create kits for use at home, the office, at school and/or in a vehicle:

•Water—one gallon per person, per day (3­day supply for evacuation, 2­week supply for home)
•Food—non­perishable, easy­to­prepare items (3­day supply for evacuation, 2­week supply for home)
•Flashlight
•Battery­powered or hand­crank radio (NOAA Weather Radio, if possible)
•Extra batteries
•First aid kit
•Medications (7­day supply) and medical items
•Multi­purpose tool
•Sanitation and personal hygiene items
•Copies of personal documents (medication list and pertinent medical information, proof of address, deed/lease to home, passports, birth certificates, insurance policies)
•Cell phone with chargers
•Family and emergency contact information
•Extra cash
•Emergency blanket
•Map(s) of the area

Consider the needs of all family members and add supplies to your kit. Suggested items to help

meet additional needs are:

•Medical supplies (hearing aids with extra batteries, glasses, contact lenses, syringes, cane)
•Baby supplies (bottles, formula, baby food, diapers)
•Games and activities for children
•Pet supplies (collar, leash, ID, food, carrier, bowl)
•Two­way radios
•Extra set of car keys and house keys
•Manual can opener
Additional supplies to keep at home or in your kit based on the types of disasters common to your area:
•Whistle
•N95 or surgical masks
•Matches
•Rain gear
•Towels
•Work gloves
•Tools/supplies for securing your home
•Extra clothing, hat and sturdy shoes
•Plastic sheeting
•Duct tape
•Scissors
•Household liquid bleach
•Entertainment items
•Blankets or sleeping bags

Pack the items in easy-to-carry containers, label the containers clearly and store them where they would be easily accessible. Duffle bags, backpacks, and covered trash receptacles are good candidates for containers. In a disaster situation, you may need access to your disaster supplies kit quickly - whether you are sheltering at home or evacuating. Following a disaster, having the right supplies can help your household endure home confinement or evacuation.

Make sure the needs of everyone who would use the kit are covered, including infants, seniors and pets. It's good to involve whoever is going to use the kit, including children, in assembling it.

Disaster Supplies Kit Checklist for Pets


•Food and water for at least three days for each pet, food and water bowls and a manual can opener
•Depending on the pet, litter and litter box or newspapers, paper towels, plastic trash bags, grooming items, and household bleach
•Medications and medical records stored in a waterproof container, a first aid kit and a pet first aid book
•Sturdy leashes, harnesses and carriers to transport pets safely and to ensure that your pets cannot escape. A carrier should be large enough for the animal to stand comfortably, turn around, and lie down. Your pet may have to stay in the carrier for hours. Be sure to have a secure cage with no loose objects inside it to accommodate smaller pets. These may require blankets or towels for bedding and warmth and other special items
•Pet toys and the pet's bed, if you can easily take it, to reduce stress
•Current photos and descriptions of your pets to help others identify them in case you and your pets become separated, and to prove that they are yours
•Information on feeding schedules, medical conditions, behavior problems and the name and telephone number of your veterinarian in case you have to board your pets or place them in foster care.

Additional Supplies for Sheltering-in-Place

In the unlikely event that chemical or radiological hazards cause officials to advise people in a specific area to "shelter-in-place" in a sealed room, households should have in the room they have selected for this purpose:

•A roll of duct tape and scissors
•Plastic sheeting pre-cut to fit shelter-in-place room openings. Ten square feet of floor space per person will provide sufficient air to prevent carbon dioxide buildup for up to five hours. Local officials are unlikely to recommend the public shelter in a sealed room for more than two-three hours because the effectiveness of such sheltering diminishes with time as the contaminated outside air gradually seeps into the shelter.

Always keep a shut-off valve wrench near the gas and water shut-off valves in your home.

For more information on how to prepare, check out the CDC's website at: