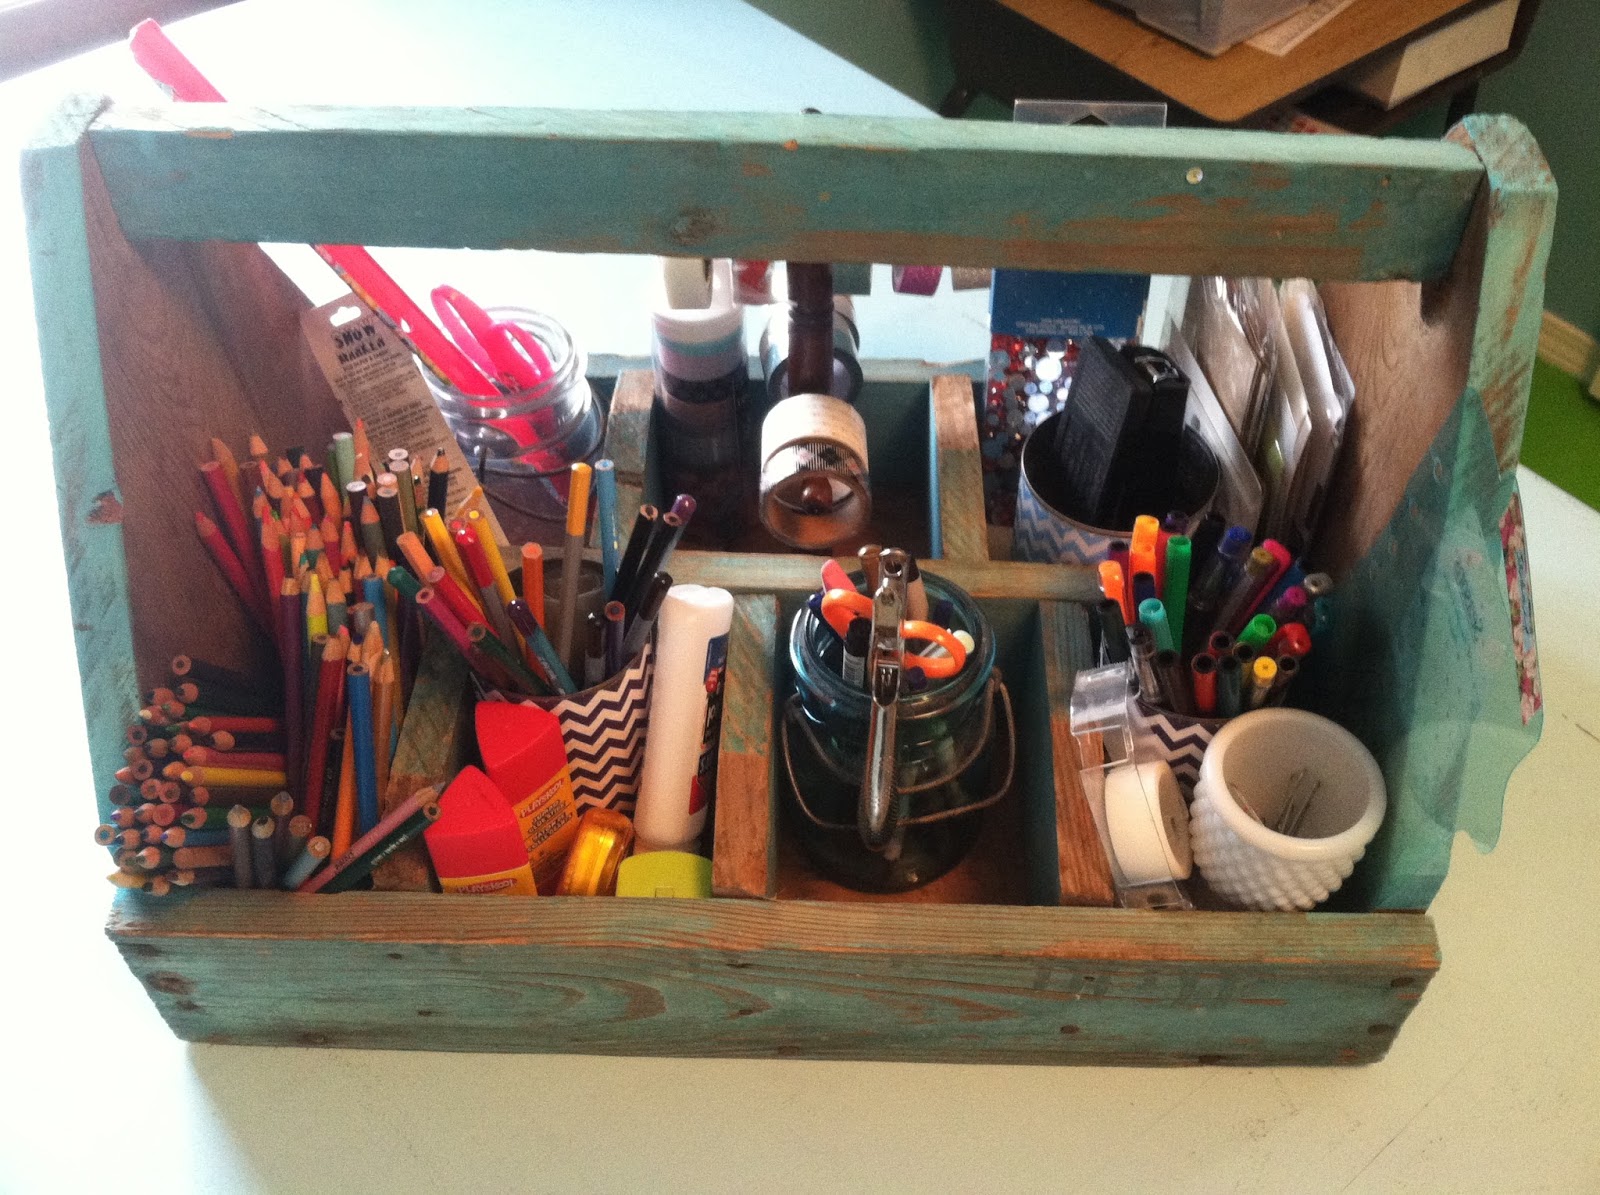
I found this old tool caddy at an estate sale about 7 years ago. It came full of nuts and bolts and lots of dirt and this really cool turquoise color. It sat in a shed all these years because I just couldn't figure out what to do with it. It has separate compartments that I thought would be perfect to hold mason jars but it's just a bit large for the kitchen table.
I was trying to find some way to keep pencils, markers, etc., organized but close at hand in my craft room and finally found the perfect use for it!. I can keep it on my work table to keep everything at my fingertips but easily move it under the table if I need to cut out fabric.
Having a laminator and a binding machine at my disposal has opened up a world of possibilities for paper crafting. I am making booklets for everything I can think of.
So I thought everyone needed a journal at Christmas. I started by finding paper for the covers that I thought the recipient would like and laminated them. I then typed up some bible verses that I like in different fonts and printed them out on 8.5 by 5.5 size paper. My first thought was that I would use those verses on dividers for sections in the journal. Maybe 12 sections, one for each month. I ended up making a couple of journals with 12 tabbed dividers then made others without.
I'm not much on journal writing myself, so I didn't know how the recipient might use them. I thought they would perfect for daily journaling, but also thought they would work well for a prayer journal, or jotting down notes when researching bible topics.
I made a bookmark to match each journal and wanted a tassel on each one. I had to watch YouTube videos to learn how to make tassels..... I bought embroidery floss in colors to coordinate with each journal and made a tassel for each. Turns out, tassel making is very easy. I took these pics before making the tassels.
Hard to see in this pic, but I used a stamp and a VersaMark stamp pad for the square embellishments on the cover and bookmark. This stamp pad creates a translucent watermark or tone-on-tone image instead of color.
I found the washi tape used in this journal at Target, in the "Dollar Spot". I wish I had gotten more of it!
I used washi tape to adhere the bible verses on these dividers and tabs before laminating.
This cover and bookmark are embellished with another Target dollar spot washi tape.
I had this really cute applique design from Applique Planet, (which primarily sells applique designs geared towards children) and after making a t-shirt for Rylan with this same design I decided I needed one for my kitchen. Their appliques are really detailed and stitch out perfectly. I especially love the heavy top stitching on top of the satin stitch.
Due to the extra applique fabric, embroidery thread and stabilizers, the embroidered side of the towel is heavier than the other, which can cause it to slip off of towel racks, which is extremely annoying in the kitchen. To prevent this, I now add weight to the other side of the towel by adding a little extra fabric or interfacing to the band at the lower edge. It's tucked into the wrong side of the band so it doesn't show but it serves to balance out the weight.
These pictures were taken after I'd used the towel and washed and dried it. I didn't use fusible webbing on the applique fabric and even though I prewashed all fabrics, you can see that it still puckered a little after laundering.
I have gotten a little bored with my china cabinet because I feel like it's just too much wood. I really like painted furniture and I thought I might want to paint it. Not all of it - but maybe just the base, or the back of each section. My current favorite color is sage green so I was thinking that's what I would do. But painting is a lot of work and I wasn't sure if the paint would stick without sanding and priming and I knew I was never going to empty it and haul it outside to work on it. So it just sat there.
Caroline got on a crafty streak and took a country style cabinet and "upcycled" it by removing the doors and painting it. She mentioned that she wanted to get that fake tin from Home Depot and put that on the back of the shelves but it was too expensive so she bought a roll of embossed wallpaper instead ($20). When she showed me what she'd purchased I realized I had an almost complete roll of it myself, so she took that to use and returned what she'd bought.
She also took some of the "oops" paint that I've been stockpiling to paint the wall paper. Everytime I go into a home store I can't help but look at the marked down paint that they sell for pennies on the dollor and buy it for future projects. She cut the wallpaper to fit each section, painted it, and then glued it in place after the paint was dry. I couldn't believe how cute it was and I also couldn't believe I'd never thought of it myself! I already had all the stuff to do it too.
This method is great cause it's quick, easy, cheap and there's no commitment. I can literally change out the panels at any time. I used double sided tape to affix the panels in place. I will probably get tired of the sage green before long and I'm thinking that I can use red or a beige for Christmas. I can always save the panels, roll them up to store right in the cabinet, and change them out whenever I want.
The wallpaper is not actually paper, it's something much sturdier, probably synthetic, which is good cause it will hold up to all the paint without disentigrating. It's heavily textured, which means that you have to work to get the paint in all the cracks and crevices. I just cut mine to fit, laid it all out on some brown paper in the garage and started painting. I had some "oops" paint in a sage green and I used a sponge brush. It didn't take much time at all to paint and dried very quickly. I let it dry overnight to be on the safe side then cut some small pieces of double sided tape and affixed them to each corner, then placed the panels in the cabinet.
Stephanie's kitchen is green and pink so I made a table runner that would match her colors. Her Christmas tree is white, covered with pink and silver balls and other decorations.
After my Fall Table Runner, which turned into a long drawn out project, I wanted something fast and easy. If I'd had a "jellyroll" it would have been even faster, but I used scraps of fabrics left over from dresses that we sold. I cut the strips about 16 inches by 2-1/2 inches with a rotary cutter. I wanted the finished runner about 15 by 60, so I cut a piece of batting a little bigger than that, as well as the backing fabric (I used plain white, cause I had a lot of it already). I should have used temporary spray adhesive to hold the batting to the backing fabric, but I forgot till I was about half way through the whole project. I just used pins and it worked fine.
I started by placing one strip approximately in the center of the runner, right side up, and sewed it down to the batting and backing, using a 1/4" seam. Then I laid the next strip on top of that first strip, right sides together, and stitched over the first seam. I then turned the 2nd strip over and pressed the seam flat (being careful not to melt the batting!). I kept adding strips in this manner until I got to one end. Then I started doing the other end by placing a strip over that very first strip, and working toward the opposite end. You basically work from the center of the runner to the ends. It was so fast and easy. Then I had to "true up" the edges using the rotary cutter. I serged the edges just to make it easier to deal with in the binding process.
Next I embroidered snowflakes on each end. I had bought some iridescent and metallic threads during JoAnn Fabric's after Thanksgiving Doorbuster Sale and tried them out. I slowed the machine speed down, used a metallic needle and still had the thread break a few times. [Sidebar: I had lots of problems with the next couple of projects I did after the snowflakes - thread shredding, "nests" and so on. After researching the problems, I realized it was operator error (always is). I have a habit of impatiently pulling the thread cone off when I'm changing threads, and pulling the thread tail back through the needle and tension mechanism when I should snip the thread and pull the extra piece of thread thru the needle. I happened to see a glimmer of that iridescent thread in the "works" and once I got it out I didn't have any more problems. I guess it does really pay to read and follow the directions.]
After the thread issues, I was anxious to get done with the table runner quickly. I had already made bias binding out of the green stripe fabric, but at the last minute decided to use lime green jumbo ric rac to finish off the edges. It was super fast and looked really cute.
I have a couple more runners cut and ready to sew. I'll post pics of those when (if?) I finish them.
"Boutique" handbags are very popular right now, and they're quite pricey. I wanted to try making one so I searched the internet for some ideas using "boutique tapestry handbag purses" as search terms but didn't come up with anything. I stumbled upon one on Pinterest that described it as "boho" and "gypsy" .... who knew??
This style handbag uses various tapestries, chenille, trims, satin, etc. all in the same bag. Pictured below are three "Gypsy Boho Handbags" I made recently.
The bottom two are made with a 1970's era pattern. The black/brown one on the right is full size and the sage green/brown one on the left was made a little smaller. I looked at the pattern and thought it was way too large so I made it smaller, only to find that I need all the room I can get.
The green one is made with a green/brown/gold tapestry, brown chenille (front panel and strap lining) and faux suede (gusset and strap). I trimmed the flap with brown and gold. The flower on the front is made with the same fabric I lined the purse with. I used an antique silver and amber pin that I seldom wear to finish it off.
The second purse was made with black, brown, green and mauve tapestry and brown chenille for the front and gussett. The straps and lining are a cheetah print. The straps are extra long and can be tied or slipped through a D-ring (haven't decided which I like best). This picture shows the gusset, which allows for LOTS of stuff in the purse.
Here's a close-up of the flower on the black/brown purse. I used the cheetah print and black chiffon for the flower and finished it with a vintage faceted glass button. I used a black chiffon ruffle and "eyelash" trim on the flap of the purse also.
The third purse is made from a black/gold tapestry. I made the straps from a cheetah print "velboa" fabric which is soft and has a nap to it. I inserted ruffled chiffon all around the side, added a gathered strip of the cheetah to the front flap and finished the flap with a tassel trim. I lined this purse with brown satin. All three purses have one or two pockets sewn into the lining.
I wanted to make a Fall themed table runner this year (before Fall was actually over . . . ) and I actually got it done!! As some of you may know I have a Phd. in sewing (lots of Projects Half Done). So when something gets completed timely it's exciting.
I have a few fallish embroidery/applique designs that I wanted to use. The Acorn is from http://www.swakembroidery.com/ and it was Free!! It really was fast and stitched up nicely. The pumpkin was from http://www.digistitches.com/. For some of the blocks I used two pumpkins, mirror imaged one and stretched them to make them look a little different. The turkey also came from Digi Stitches. We've sold many a t-shirt and dress with this applique on it. For the pumpkin and turkey you can choose to use a satin or zig zag stitch to finish. I used both in the table runner.
I started with muslin squares, about 8" each and appliqued pumpkins, acorns and turkeys on 7 squares. Each block has a slightly different design and fabric and color choices. I used my embroidery machine (of course!) to applique each block.
Once each block was done I thought they were a little boring. I did a little research and decided to make each block into a "snowball" block. This way there's less muslin showing.
To make the snowball blocks, you basically start with small squares (mine were 4"), draw a line through each diagonally, stitch one in each corner, cut off excess and press. Here's a picture that shows each step, double click to make the picture larger so you can see details.
I laid out the blocks on the table and arranged them the way I thought they looked best. Three face one way and three face the other way with one in the center. Then I alternated the color of the corners on each block (pumpkin/orange).
After each block was done I used a dark print for the sashing strips that join the blocks together.
Then to make it more complicated I finished it off with Prairie Points which I think add a lot to the look. They're actually not hard to do. Again I started with 4" blocks. I used the pumpkin/orange broadcloth and alternated colors around the edge. It took just a little adjustment to make sure they lined up correctly.
I think the overall effect would have been better if I'd used batik fabrics, but with the exception of the dark print used for the sashing I used scraps I had on hand left from other projects.
A table runner is basically a table sized quilt and has to be "quilted". I had grand ideas of quilting the whole thing with the embroidery machine, but I ran out of stabilizer and decided to finish up on the sewing machine. If you look closely you can see the quilting design of acorns and oak leaves in the sashing in the picture below.
Talk about easy! There's NO way I would ever attempt to do this by hand. It would take a lifetime. I finished up the straight stitch quilting on the sewing machine, boring but effective.
I also made a kitchen towel using some leftover fabrics. I used Monogram Wizard for the "Harvest Blessings".
I am making potholders now and will post some pics when (if...) I get done with that project.
I love fabric stores but there aren't many left in these parts. Most of my purchases these days are online. I heard that even Wal-Mart is discontinuing sewing departments in its stores. No matter whether I'm online or in a store, I am compelled to browse the clearance section and every now and then I find something worth buying. Recently, I found some interesting fabrics at Wal-Mart on clearance for $1.00 per yard.
The price of patterns has gotten ridiculous so I only buy them when they're on sale for 99 cents each, then I usually get about 10 at a time. If I don't ever use the pattern I can sell it on Ebay and recoup my cost.
Here are a couple of pics of my cardigan & tank top set that only cost $5 including the cost of the pattern, made from my $1/yard clearance fabric. The fabric is a knit with several different colors and has a slightly nubby texture, very lightweight and comfortable.
I've been sewing on and off for 30 years and recently came across something that I'd never heard of before and now wonder how I ever lived without it - double needles. I always thought you had to have a special sewing machine to use double needles. Now that I know I can use them on my sewing machine I've bought every one I could find, including one for stretch knits. You can see the topstitching on the closeup of the tank top done with the double needle. There's no way I could ever top stitch so precisely without it.
Here’s a quick and easy project you can make for yourself or to give as a gift.Following are the instructions for the two different types that I’ve made.
Method 1 - Using purchased terry towels
I purchased plain white waffle-weave cloth towels in the kitchen department of the local “big box” store.They came in a pack of three for less than $6.Prewash and dry the towels and press.Do the same for the fabric unless you buy quilting cotton, in which case it’s already preshrunk.
Using the width of the purchased towel as a guide, cut a band of fabric the width of the towel plus 1” (the seam allowances will be ½”).Make the band as long or as short as you want, this is just the decorative band which will be at the bottom of your finished towel.This is where you can use scraps left over from other projects.In this case I used a band about 5” long so that I ended up with a 4” strip at the bottom of the towel.
Cut off the hem from the bottom only of the purchased towel.
With the right side of the band to the wrong side of the towel, and raw edges even, stitch or serge using ½” seam allowance.
Press, folding band to the right side of the towel.Then press under your seam allowances on all raw edges of the band – 1/2” on each side of the band and ½” at the top of the band.Press well.
If you want to add any embellishment, such as ric-rac, this is the time to do it.I inserted jumbo ric-rac just under the band so the top of the ric-rac shows after it’s all assembled.You could also add piping or a coordinating strip of fabric.If you’re using any embellishment, stitch it in place before proceeding to stitch the sides.You can also add a decorative stitch here.I used the featherstitch.
Then stitch along each edge of the band using a regular straight stitch to secure the edges of the band to the towel.That’s it!
Finished Towels, to be given as Christmas Gifts!
Method 2 - Creating your towel from fabric
This method is a little more work.You’ll need a fabric that’s 100% cotton for absorbency.I used an interesting heavy fabric that I found at the quilt store for the “towel” part and a pretty green and red paisley for the decorative band.
Decide what size you want to make your towel.The best way to do that is look at some towels you already have and measure them.I wanted mine about 18 x 28 inches, finished size.Be sure to add ½ inch seam allowances to all edges before cutting.
So, I cut the "towel" fabric 19” wide by 25” long and the decorative band fabric 19” wide by 9” long.
With right sides together, having raw edges even, stitch or serge the decorative band to the towel. Press, pressing seam toward band.
If you have a serger, serge all edges then turn under ½” and press.If you don't have a serger, press under 1/4" then press under 1/4" again (basically you're making a 1/4" hem on all sides).
Fold the decorative band wrong sides together so that the pressed edge meets the seam on the back of the towel.Press well then “stitch in the ditch” on the right side, catching the pressed edge of the band on the back of the towel.
Journey came before Christmas and we couldn't find a Baby's First Christmas stocking anywhere. Her Mom is planning to make her a felt embroidered stocking for next Christmas, but what would we do this year?? Grandma made her a quick and simple stocking. If only Grandma had an embroidery machine... think what I could do! Here's a tutorial if you'd like to try it out yourself.