Occasionally I have looked at the grocery store for the packaged butterscotch pudding mix that you have to cook. I haven't been able to find it. I do find the instant puddings, which I don't like. I guess demand has just dwindled to the point that they no longer make it, perhaps due to the convenience of prepared puddings in cups.
I LOVE butterscotch pudding. Chocolate comes in third, after tapioca. What's strange though is that I like pudding HOT. Once it's cold I don't like it. I think I get this from my Dad. He used to have his pudding, hot or warm, with cream on top. Not whipped cream, regular cream. Yum.
Anyway, one day I was looking for a recipe for pudding that I could make without eggs (Journey is allergic) to use as a pie filling. I found a recipe for "Chocolate Cornstarch Pudding" in the 1976 version of Joy of Cooking. This particular recipe called for a double boiler set up and a lot of time. I didn't want to go to all that trouble, but this was the only egg-free recipe I could find.
I thought about those packaged mixes.... they don't require a double boiler and the cornstarch is already mixed in. That's why they're so quick and easy. I figured I could adapt this recipe to work without a double boiler.
I first made the chocolate version for the pie, then later came up with a butterscotch recipe. They're both good, but I like the butterscotch best. Here are the recipes.
Easy Egg Free Chocolate Pudding
In a medium saucepan, mix together:
3 Tbsp. cocoa
1/2 cup sugar
1/8 teaspoon salt
1-3/4 cups milk
1 Tbsp. butter
In a separate cup/bowl, stir together 1/4 cup milk and 3 Tbsp. cornstarch. Mix well. Set aside.
Heat cocoa/milk mixture on medium-high heat, stirring occasionally, till it comes to a boil. Pour in the milk/cornstarch mixture. Stir well. Bring back to a boil, continue to cook and stir for about 1 minute more. Remove from heat and stir in 1 tsp. vanilla (optional). Pour into four bowls. Makes about four 1/2 cup servings.
Easy Egg Free Butterscotch Pudding
In a medium saucepan, mix together:
1/2 cup BROWN sugar
1/8 teaspoon salt
1-3/4 cups milk
1 Tbsp. butter
In a separate cup/bowl, stir together 1/4 cup milk and 3 Tbsp. cornstarch. Mix well. Set aside.
Heat milk/sugar mixture on medium-high heat, stirring occasionally, till it comes to a boil. Pour in the milk/cornstarch mixture. Stir well. Bring back to a boil, continue to cook and stir for about 1 minute more. Remove from heat. Pour into four bowls. Makes about four 1/2 cup servings.
Saturday, October 20, 2012
Friday, October 12, 2012
Tunic to Camisole Refashion & Handmade Sweater

Stephanie brought me this tunic from Qatar. It's a silky fabric, fashioned like a caftan but short for wearing with pants. It fit when she first gave it to me, but let's just say it must have shrunk in the wash... so it hung in the closet, unworn.
Meanwhile, my sister Kathy sent me a hand knitted sweater that she made. It's a shrug type sweater in a salmon color.
I realized that I could refashion the tunic top to work with the new sweater. It's hard to tell in this pic, but the side seams are actually about 2.5 inches in from the brown border, so I knew there was enough fabric to let it out. I decided to make it into a camisole.
I used a camisole view from a sleepwear pattern. The tunic had a border of brown on all sides including the hem. I wanted to keep the hem as it was. I took apart the tunic at the seams and laid out the front and back pattern pieces on the tunic front and back, making sure the bottom of the pattern piece lined up with the finished hem on both pieces.
It was very simple to sew up this camisole, but when I tried it on, it was huge! I'd already sewed on the facings by this point, as well as the straps, so I wasn't turning back now. (Yes, I know I should have tried it on sooner) I stitched in some shirring with elastic thread on the front and back. That did the trick. It fits well and is very comfortable.


Sorry for the poor photos, they really don't do justice to the beautiful sweater my sister made, or the really pretty silky fabric of my "new" camisole.
I like this idea of recycling things I own into something new. Next upcycle project will be a corduroy jumper for Journey from a skirt I haven't worn since, well at least four sizes ago.
Tuesday, October 9, 2012
My DIY Upholstered Headboard

Before we moved we had a sleigh bed, with a headboard and footboard. This is what it looked like:

I knew I wanted to find a machine washable comforter. I really want a quilted bedspread, but can't find just the one I want and haven't devoted the time and expense towards making one myself. I found one that worked with my color scheme at Anna's Linens. It is machine washable but looks like silk.
I also knew that I wanted an upholstered headboard. I found several online that were nice but too expensive. Target has one that you can slipcover for around $200, but add to that the cost of the slipcover fabric...
Pinterest has scads of upholstered headboards with links to tutorials. I studied them all carefully and decided to go for it.
I found a beautiful cut velvet upholstery fabric at JoAnn, which I was able to get for 50% off. The total cost of the fabric was about $45. I have just enough fabric left over to make a pillow, so I got just the right amount. I like the look of brads and various shaped headboards but with this detailed fabric I decided that a fairly plain design would be best.

I won't repeat the tutorial here because you can search google or pinterest and find 29,000 good ones. In a nutshell, here's what I did. First I cut brown paper in the size and shape I thought I'd want and taped it to the wall above the bed to get an idea of what I wanted it to look like. After I knew the exact dimensions, we bought a sheet of 1/2" plywood and Marc cut it to size. I used a paint can as a template to round the corners.
Some of the tutorials online said to use foam and batting and some said just batting. Trying to save a nickel, I just used batting (which I got half off at JoAnn's too). In retrospect, I wish I'd gone ahead and added the foam, but it's ok without the foam. I used two layers of batting. I laid out the batting on the floor, smoothed it out, and laid the plywood down over it, pulled the batting over to the back of the plywood and stapled. {Sidebar note: we bought an electric staple gun when we were putting the insulation in the last house. It is worth the $$ many times over for that, and makes various diy project so fast and easy.} Then I laid the fabric down and made sure it was smooth, and stapled. I pulled it taught first of course. When we stood up the headboard I looked at it surprised - surprised that it actually turned out GREAT. I expected problems.
Next came the issue of how best to hang the thing. We decided to hang it on the wall cause if we'd put legs on it, it would have been difficult to move the bed. We used "D" ring type hangers and found the studs in the wall and measured carefully... and it worked! Again, I expected problems and was surprised when there weren't any.
I have to say that I LOVE the way it turned out. The total cost, with fabric, etc. was just under $100 and took just a couple of hours. It was unreal how fast and easy it was.

Tuesday, October 2, 2012
Easy China Cabinet Update
 |
| Closeup of Wallpaper Inserts |
I have gotten a little bored with my china cabinet because I feel like it's just too much wood. I really like painted furniture and I thought I might want to paint it. Not all of it - but maybe just the base, or the back of each section. My current favorite color is sage green so I was thinking that's what I would do. But painting is a lot of work and I wasn't sure if the paint would stick without sanding and priming and I knew I was never going to empty it and haul it outside to work on it. So it just sat there.
Caroline got on a crafty streak and took a country style cabinet and "upcycled" it by removing the doors and painting it. She mentioned that she wanted to get that fake tin from Home Depot and put that on the back of the shelves but it was too expensive so she bought a roll of embossed wallpaper instead ($20). When she showed me what she'd purchased I realized I had an almost complete roll of it myself, so she took that to use and returned what she'd bought.
She also took some of the "oops" paint that I've been stockpiling to paint the wall paper. Everytime I go into a home store I can't help but look at the marked down paint that they sell for pennies on the dollor and buy it for future projects. She cut the wallpaper to fit each section, painted it, and then glued it in place after the paint was dry. I couldn't believe how cute it was and I also couldn't believe I'd never thought of it myself! I already had all the stuff to do it too.
This method is great cause it's quick, easy, cheap and there's no commitment. I can literally change out the panels at any time. I used double sided tape to affix the panels in place. I will probably get tired of the sage green before long and I'm thinking that I can use red or a beige for Christmas. I can always save the panels, roll them up to store right in the cabinet, and change them out whenever I want.
The wallpaper is not actually paper, it's something much sturdier, probably synthetic, which is good cause it will hold up to all the paint without disentigrating. It's heavily textured, which means that you have to work to get the paint in all the cracks and crevices. I just cut mine to fit, laid it all out on some brown paper in the garage and started painting. I had some "oops" paint in a sage green and I used a sponge brush. It didn't take much time at all to paint and dried very quickly. I let it dry overnight to be on the safe side then cut some small pieces of double sided tape and affixed them to each corner, then placed the panels in the cabinet.
Monday, October 1, 2012
Save with the Food Saver
After researching various models and brands on the web, I found that the better models have a moist/dry setting which helps when you are packaging wet foods, such as blanched squash or meats. I also watched some YouTube videos showing how to use it and learned some tips and tricks.
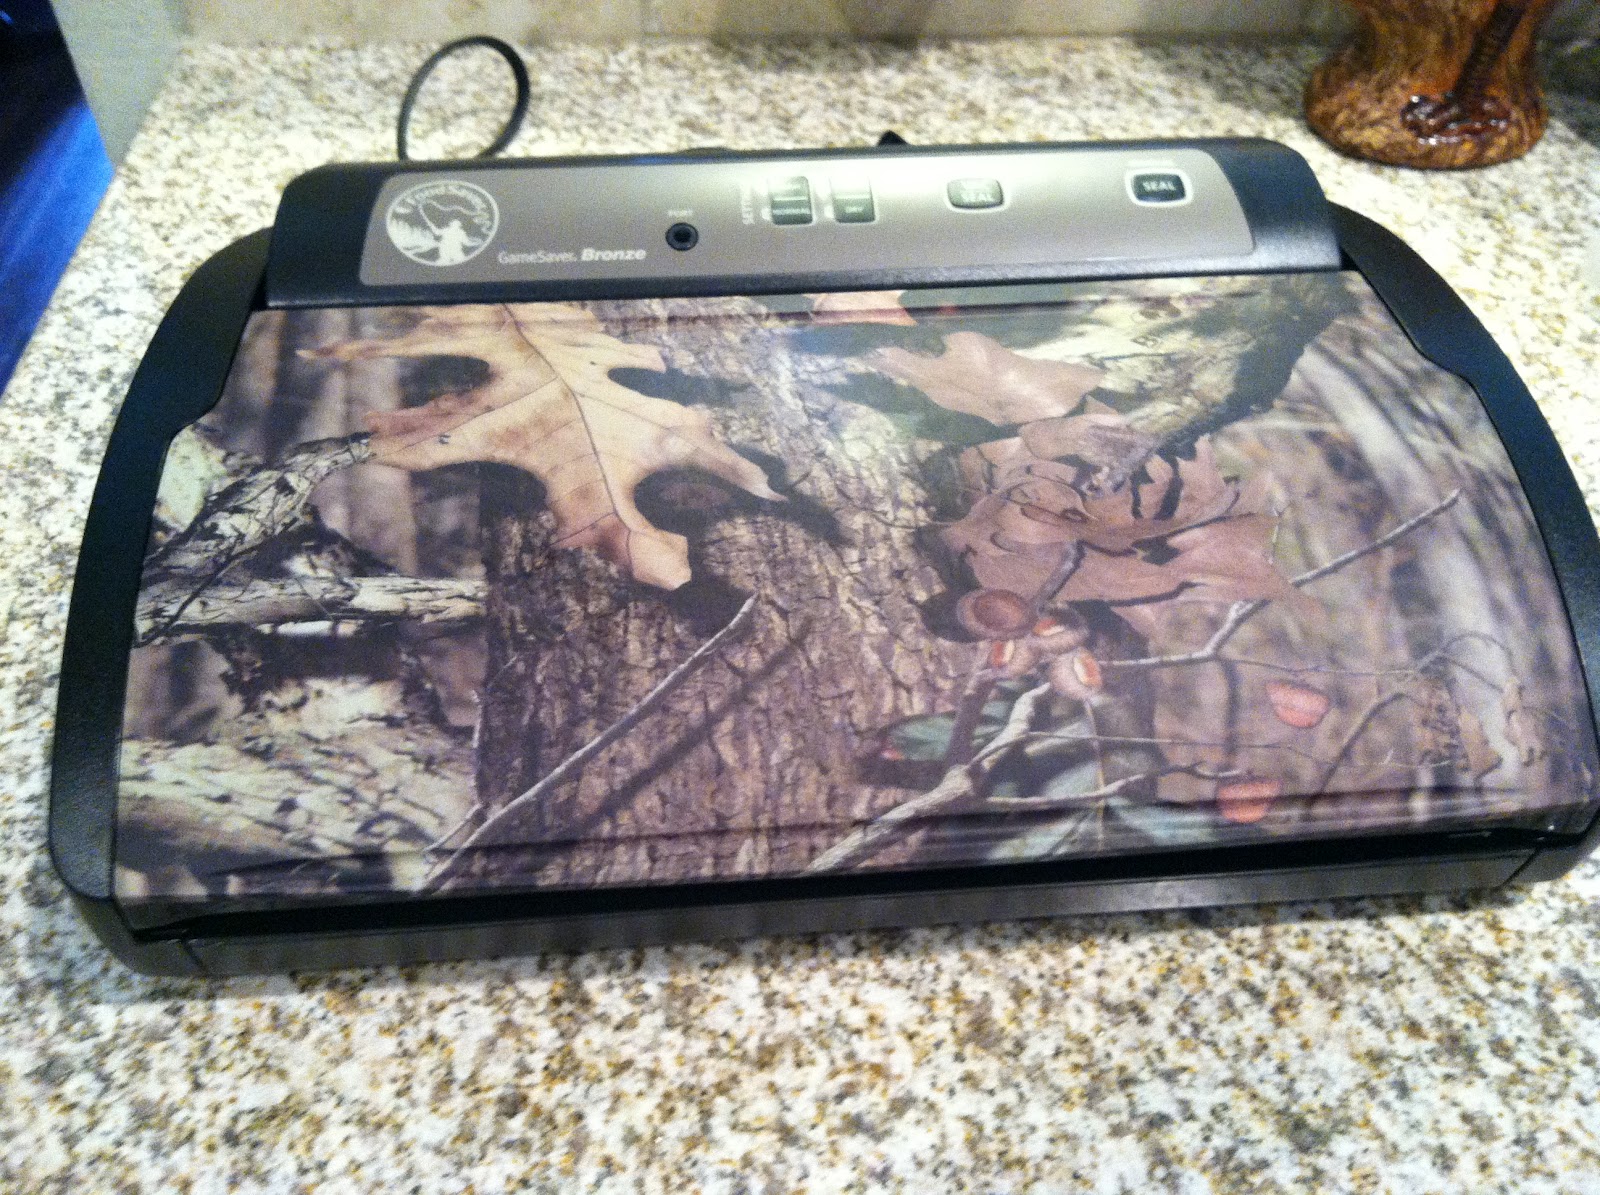
I bought the "Gamesaver Bronze" model. It was about $169.00. It has a "camo" design on it which I don't care for, but since I keep it in a cabinet I guess it doesn't matter. It has a fast and regular setting, a moist/dry setting, a separate vacuum/seal setting and a seal only setting. It also has a removeable drip tray, a built in cutter, storage compartment, and a vacuum tube for use with accessories.
I bought the "Gamesaver Bronze" model. It was about $169.00. It has a "camo" design on it which I don't care for, but since I keep it in a cabinet I guess it doesn't matter. It has a fast and regular setting, a moist/dry setting, a separate vacuum/seal setting and a seal only setting. It also has a removeable drip tray, a built in cutter, storage compartment, and a vacuum tube for use with accessories.
I also ordered a jar sealer (sold separately of course) which fits on the top of a mason jar. They have two - one for regular mouth and one for wide mouth mason jars. The regular is $8.99 and the wide is $9.99. You attach the tube to the FS, place the jar sealer on a jar on which you've placed a canning jar lid (no ring) and it sucks out all the air. You don't "can" wet foods in the traditional sense with this method, but it works to extend the freshness of dry foods like nuts, seeds, beans, etc. You can also vacuum seal refrigerated foods to help preserve them a longer. Again, it doesn't "can" foods. But it works so well you have to use a can opener to get it open. You could also use it to prepare jarred foods for freezing. Once you sign up on their website you get occasional emails with free shipping, or discounts on bags. I bought the jar sealer and got free shipping.
The FS website claims that foods keep up to 5x longer. I was skeptical at first, but my research shows that is true. I found this information to be corroborated in the Ball Blue Book and several state college extension websites.
Before buying the FS I was limited to using Zip Loc freezer bags or freezer paper. I can't find freezer paper at the local Wal Mart. I found some recently at a quilt store if you can believe it and paid $4 something for it. If you are only buying and freezing small quantities of foods you probably won't have an issue with freezer burn, but if you buy meat in bulk or raise your own vegetables you will find that Zip Loc bags aren't the answer. They do let in vapor. Before buying the FS, twice in one month we pulled some steaks out of the freezer that had been stored in Zip Loc bags which were freezer burned. A couple of episodes like this and the Food Saver will pay for itself.
The very first thing I sealed with the FS was pecans. I always check the mark down section at Kroger when I shop and I found chopped pecans for $1.25 per 6 oz. bag. The regular price was $4.65! The expiration date was many months out. I packaged them in FS bags, three to five bags per FS bag. I pierced the original bag first to make sure all the air came out. I labeled the bags with the expiration date. If I haven't used them by that date I can drop the bags in the freezer for long term storage to be on the safe side. I bought 20 of the bags and realized I should have bought all of them. I really like pecans, but they're so expensive! This way I have them ready to use. I saved $3.40 per bag, which totals $68 in savings for the 20 bags. You can see how the Food Saver will pay for itself over time.
I also learned that I can seal Mylar bags or reseal chip bags (which are usually mylar). I have sealed up wheat and beans in Mylar bags for long term storage, since I have a pretty good supply of wheat in short term storage. It doesn't vacuum the Mylar (I think because it's too thick), only seals it so you still have to use oxygen absorbers. To be on the safe side, I add a second seal about 1/2" from the first seal. Mylar bags can be purchased on the internet, but I get them at the Mormon cannery for pennies, so much cheaper than anywhere else.
To freeze meats or moist vegetables for long term freezer storage it works best if you pre-freeze the foods. You load up the bags and set them in the freezer till partially or completely frozen. This way any liquids don't get sucked up into the sealer. This is what causes most seal failures.
In the pic below you can see two chicken breasts that I've prefrozen. I am sealing them in this pic. Also you can see the bag storage area and cutter.

In the pic below you can see two chicken breasts that I've prefrozen. I am sealing them in this pic. Also you can see the bag storage area and cutter.

The bags can be somewhat expensive, however, they do keep foods 5x longer than a zip loc or freezer paper wrap. They can be purchased in pint, quart, gallon, "portion-size", or on one long continuous roll which you cut to make your own custom sizes. This is what I use. Also, they can be reused. I only reuse the ones that do not contain meats. I hand wash, air-dry and put them away for future use. You can boil the foods directly in the bags as well. They now make a bag that you can microwave in, which would be convenient for corn on the cob or other veggies.
Subscribe to:
Posts (Atom)